
Sometimes your watch band clasp will wear out before your watch band does. If you don’t want to replace your whole watch band you can always replace the clasp itself. Use this guide to learn how to change an inside open butterfly buckle that is held in place with friction pins.
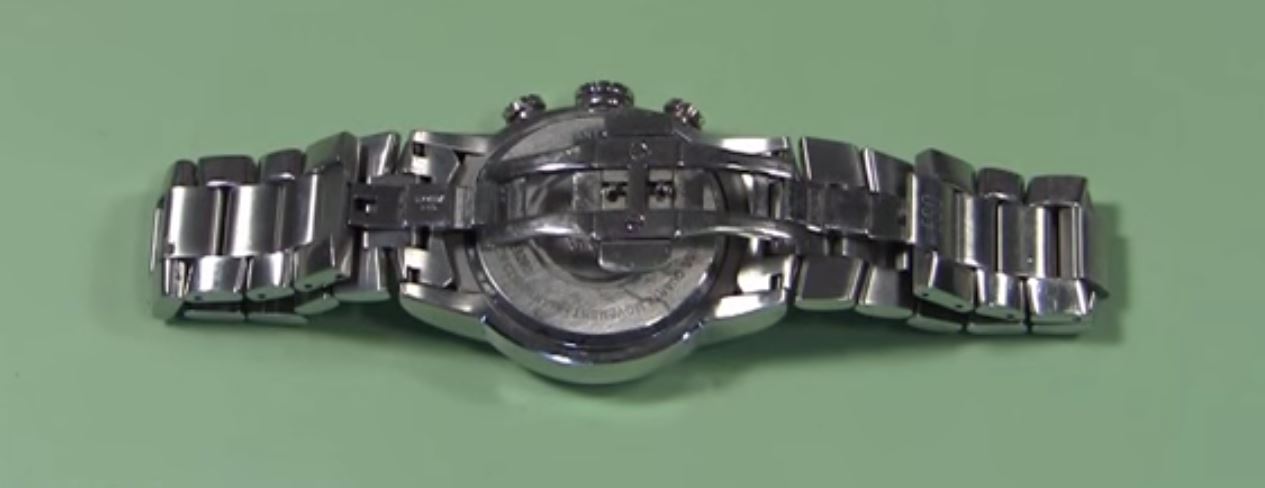
 How do you know if your watch clasp is a inside butterfly buckle? There are a couple things to look for: if your clasp is completely hidden by the watch band and all you can see is a small seam between the two parts, you have a butterfly buckle that opens from the inside. Open the clasp and look at it from the inside, the clasp should fit into a three tooth tube in the band. You will be able to tell if your clasp is held in place with friction pins if when you examine the ends of the pins they are solid pins.
 Tools Needed:

- A pin pusher
- A jeweler’s ball peen hammer
- A watch band holder
- A pair of jeweler’s pliers
- A digital gauge
- A parts tray
- A replacement inside open butterfly clasp
- And new friction pins
 Step 1

The first step in replacing a watch band clasp is to remove the old clasp. Open the clasp so that it is fully extended and you can easily access the points where the clasp meets the band. Choose one side of the watch band to start on, and insert that end of the band and clasp into the watch band holder with the watch crown facing up. Be sure to line up the hole in the band closest to the clasp with one of the holes in the watch band holder.
Step 2
 Now, take your pin pushers and test them in the hole until you find the one that fits inside the pin hole perfectly. Insert the pin of the pin pusher into hole in the band. Using the flat head end of your small ball-peen hammer, tap on the pin pusher to push the watch pin out of the band so you can remove the clasp. You will have to use some force, but start with a small amount and gradually increase the force until the pin starts moving so you don’t damage the watch.
Keep tapping on the pusher until you cannot push the pin anymore. Lift the band out of the watch holder and remove the pin if it hasn’t fallen out already. Place the loose pin in your parts tray to keep it from rolling away.
Step 3
Now you can remove the clasp from the other end of the watch band. Repeat Step 2 to free the other end of the clasp from the watch band. When the clasp is fully free of the band, set it aside so you can remember which side of the band connects to which side of the clasp.
 Step 4

Next, take the old clasp so you can measure it to ensure your new clasp will fit in your watch band. The first measurement you need is inside the two teeth of the clasp. Grab your digital gauge and use the backward opening jaws to measure inside that gap to find the inner tube size.

The second measurement you’ll need is the outside of those two teeth in the clasp. Use the large jaws of your digital gauge to find that measurement. And the final measurement is of the maximum width of the clasp itself. This measurement is taken by measuring the clasp from edge to edge at its widest point in the center.
With the measurements in hand, you can order a new watch band clasp. When you are ready to insert the new watch clasp into the watch band, you will need your two new friction pins if your old pins aren’t in good shape and cannot be reused.
Step 5
 Take your new clasp and insert one end of the clasp into the corresponding end of the watch band so that the clasp will close in the right direction for you when you are finished. The teeth of the clasp should fit between the teeth of the band perfectly like this. Holding the two pieces together, place the band and clasp in the band holder to keep the pieces together while you work. Be sure that the hole is lined up with a solid portion of the holder so you don’t accidentally push the pin out of place again.
Then, insert the first pin in hole in the end of the watch band. You will have to hold the pin in place with one hand while you take your ball peen hammer and begin to tap it into place. When the pin is part way into the band, place the pin pusher between the end of the pin and the ball peen hammer to protect the watch band as you continue to tap it into place until it is flush with the band.
Step 6
Once the pin is flush, remove the band from the holder. Connect the two loose ends of the clasp and band together and replace them in the holder and repeat Step 5 to put the ends back together.
When the second pin is flush against the watch band, you can remove the complete watch band from the watch holder and test the watch clasp to make sure it closes correctly under the watch band.
Finished
When you are satisfied that the watch band clasp is exactly what you wanted, put your watch on and wear it again. To learn how to complete other simple watch repairs, check out the rest of our Learning Center.
Leave A Comment