
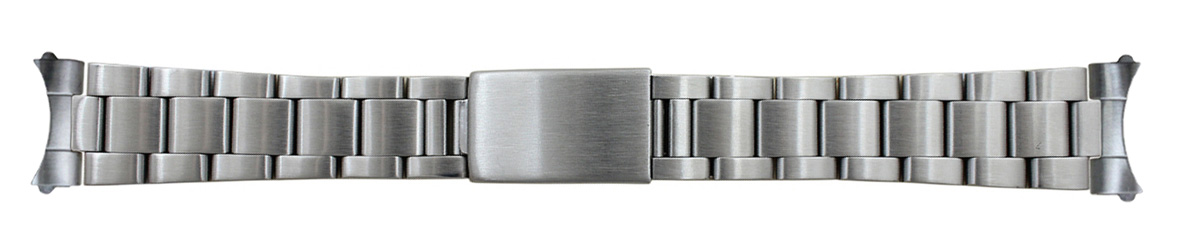
If you have a watch with an Oyster style bracelet or even a genuine Rolex with a Jubilee bracelet you might have noticed it start to get loose and “droopy” over time. These metal bracelets are made of a series of links held together with pins that over time will bend or abrade over time. Dirt and debris get between the links and work their way around the pins and act as an abrasive when the parts rub against one another. The pins then wear down and the space between the links gets larger and the band gets that droopy look.
With just a couple of tools and some new pins you can repair your watch bracelets and make the like new again.
The Rolex Oyster and Jubilee Watch Bank Link Remover Tools are designed to pull apart the links when you need to remove links to make the bracelet shorter for a better fit or just replace a damaged link. In this article we will walk you through how to use the Link Remover Tools for both Oyster and Jubilee watch bracelets as well as how to fit links back together with the link fitting tool.


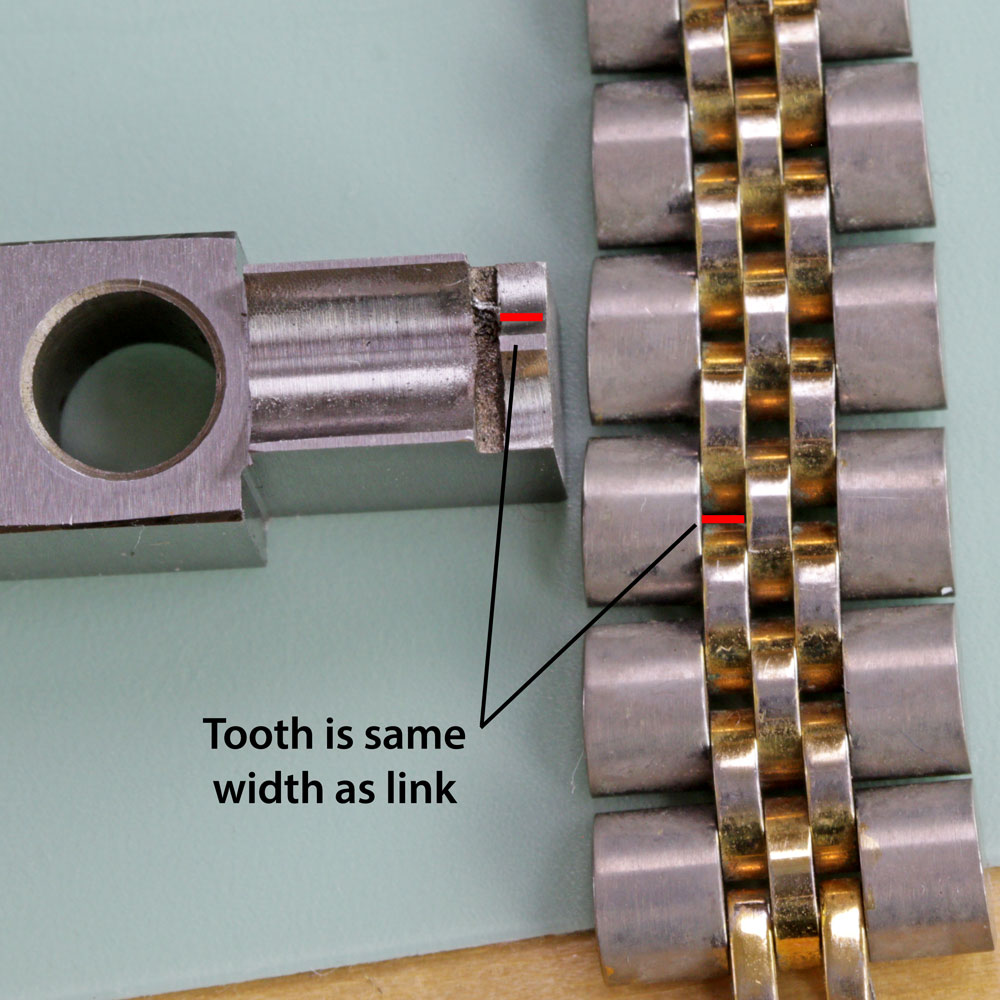
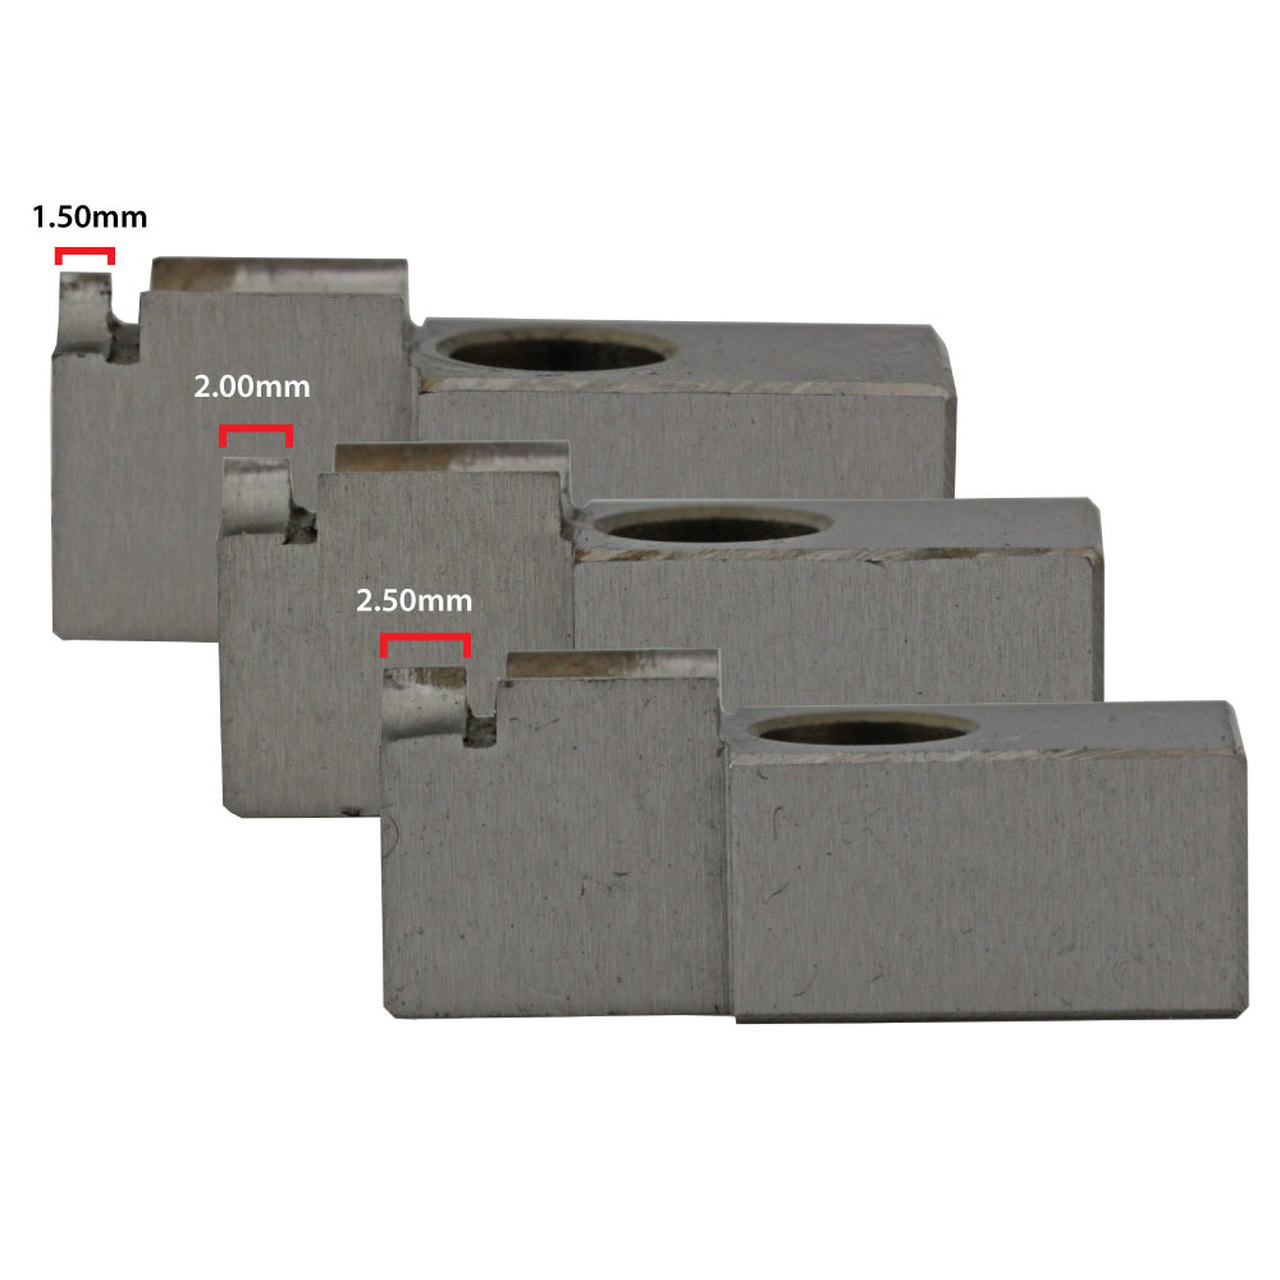
The Jubilee link remover tool works by grabbing the outside links with a curved tooth piece and pulling the link apart to separate the individual link parts. You first need to identify what size tooth piece you need to fit your Jubilee style band; the tool comes with three different sizes for ladies and gents sized bands.

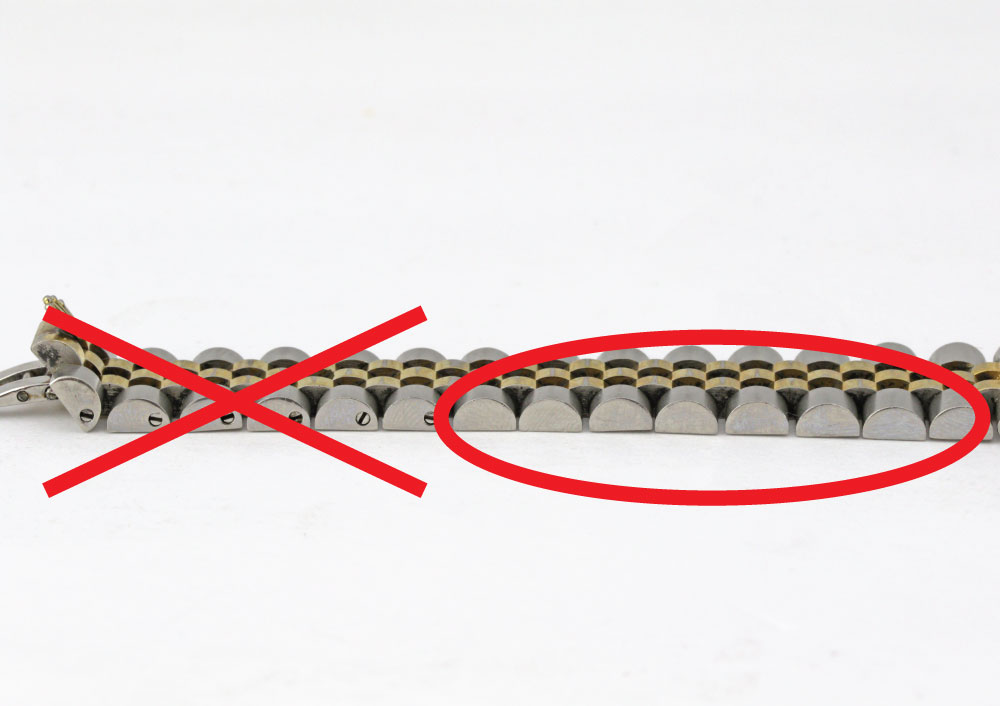
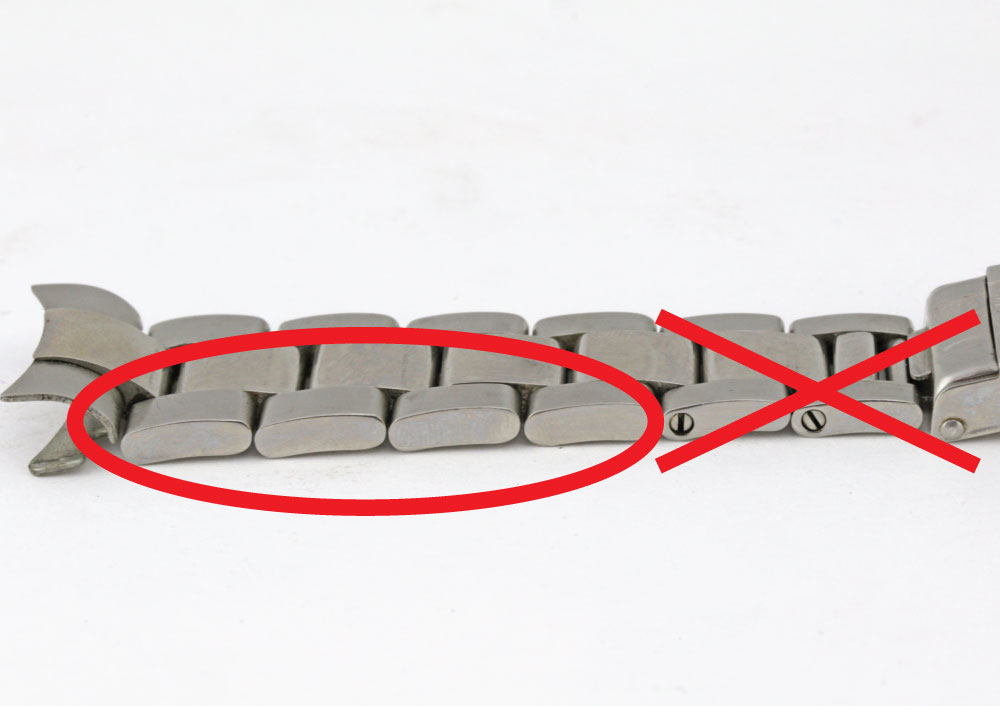
NOTE: It is important that you know that not all of the links in the band are held together with pressure fit link pins. The first couple links on the bracelet are held with link screws – you do not want to try to use this tool on those links, they just need a screwdriver to remove the pin.
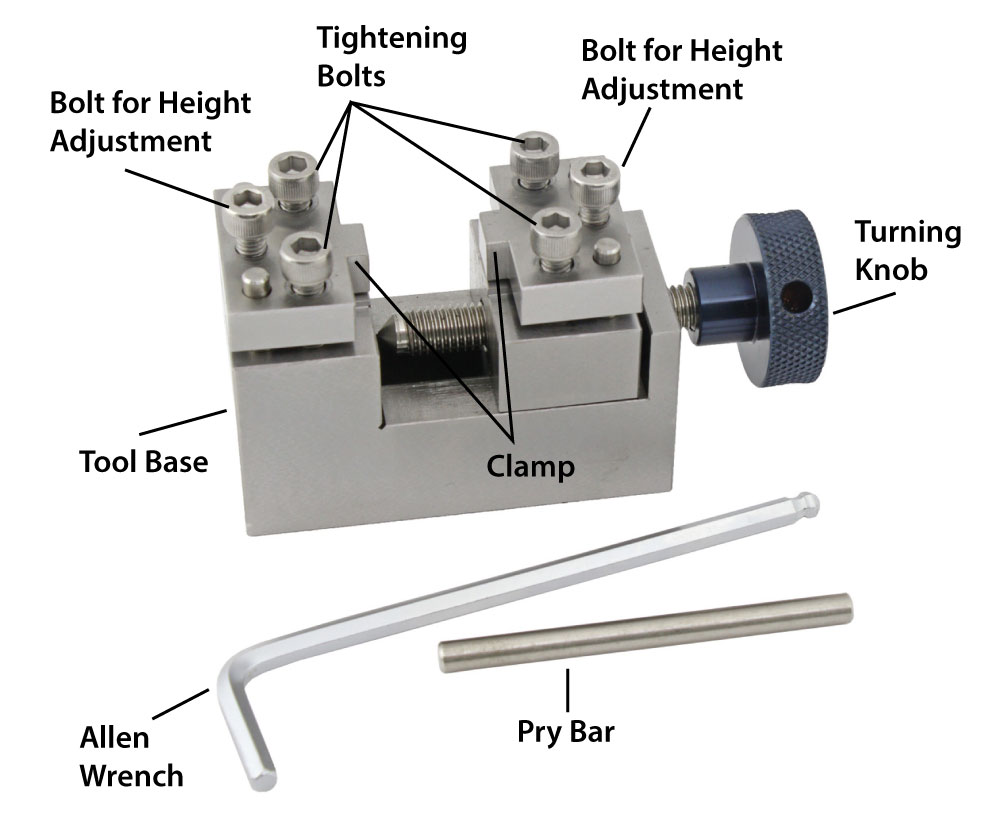
Once you have the correct tooth selected you will need to install it into the tool. Unscrew the top knurled knobs to install the teeth; use the Allen wrench to remove the set screw and then remove the knob from the holder. Slide the tooth over the holder and then replace the knob over the tooth onto the holder and replace the set screw.


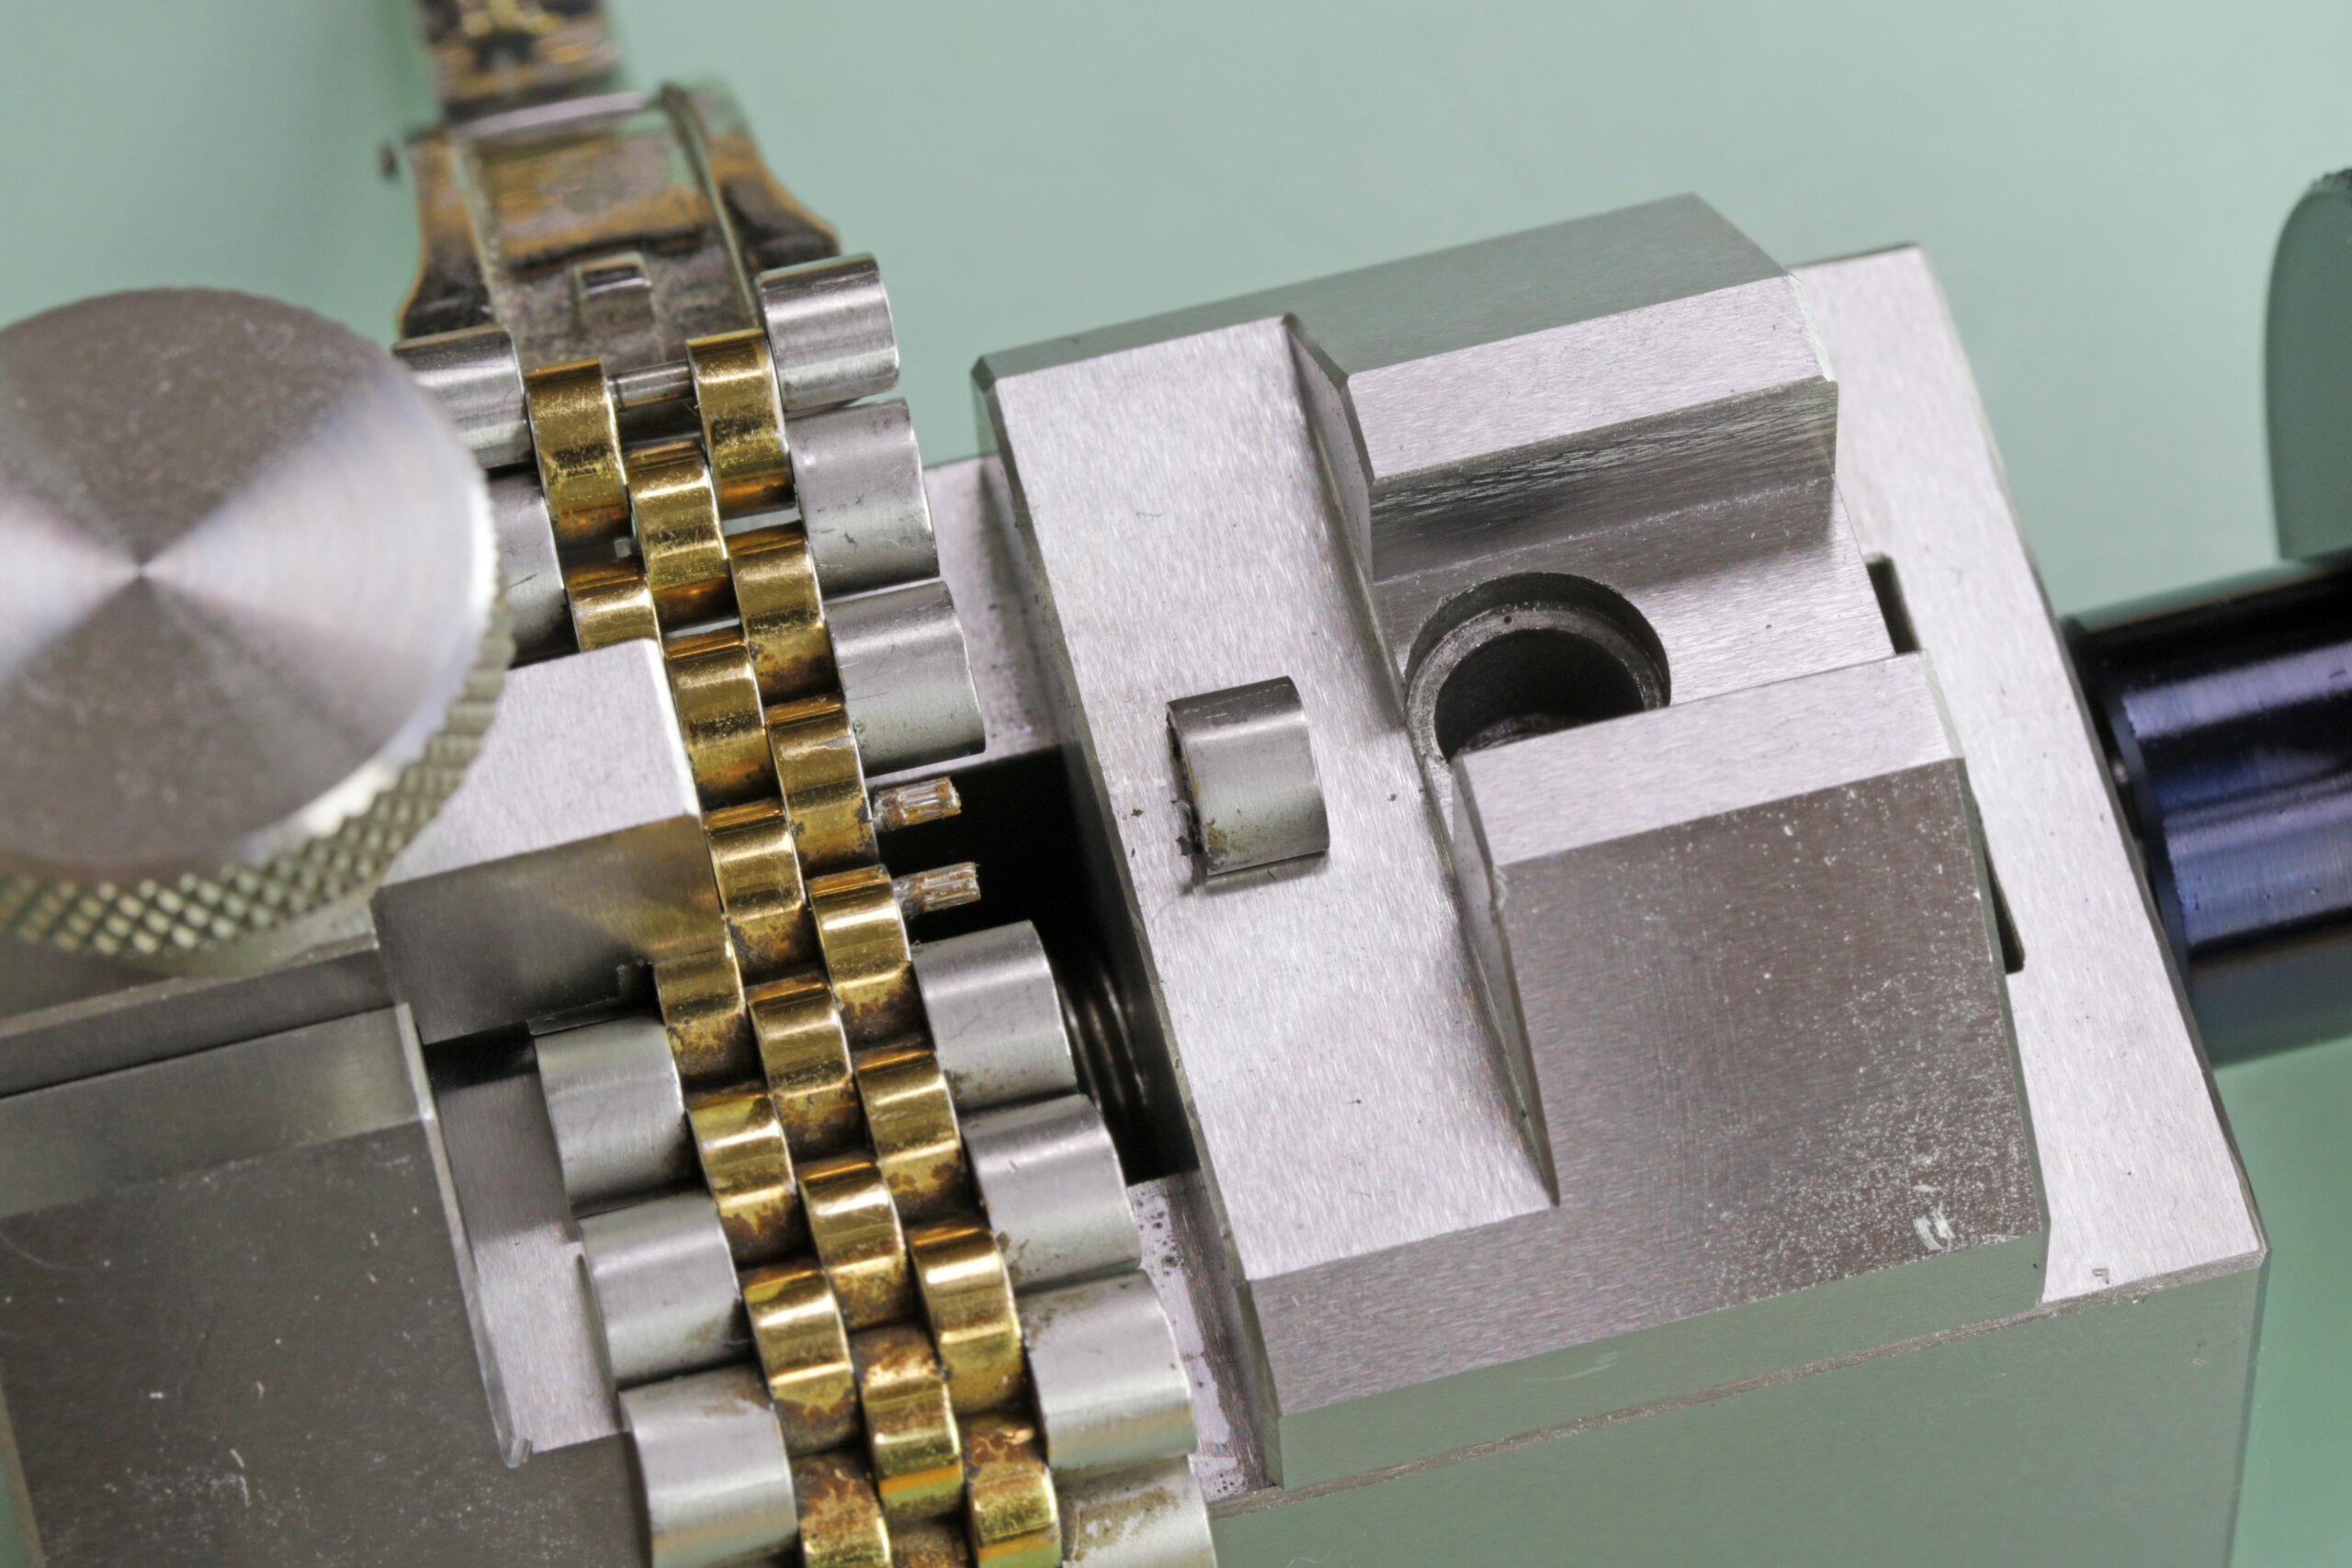
With the large blue turning knob on your right – place the bracelet over the tool, put the left side holder back in the tool and align it with the link you wish to remove; screw the holder down tight. Slide the right side piece, place the holder in, and screw down until it is in place over the link to be removed.
With the teeth securely in place over the link you wish to remove, begin turning the large blue knob until the link end is pulled off the bracelet. You might need to use the pry bar for extra torque – slide the bar into the holes in the turning knob.


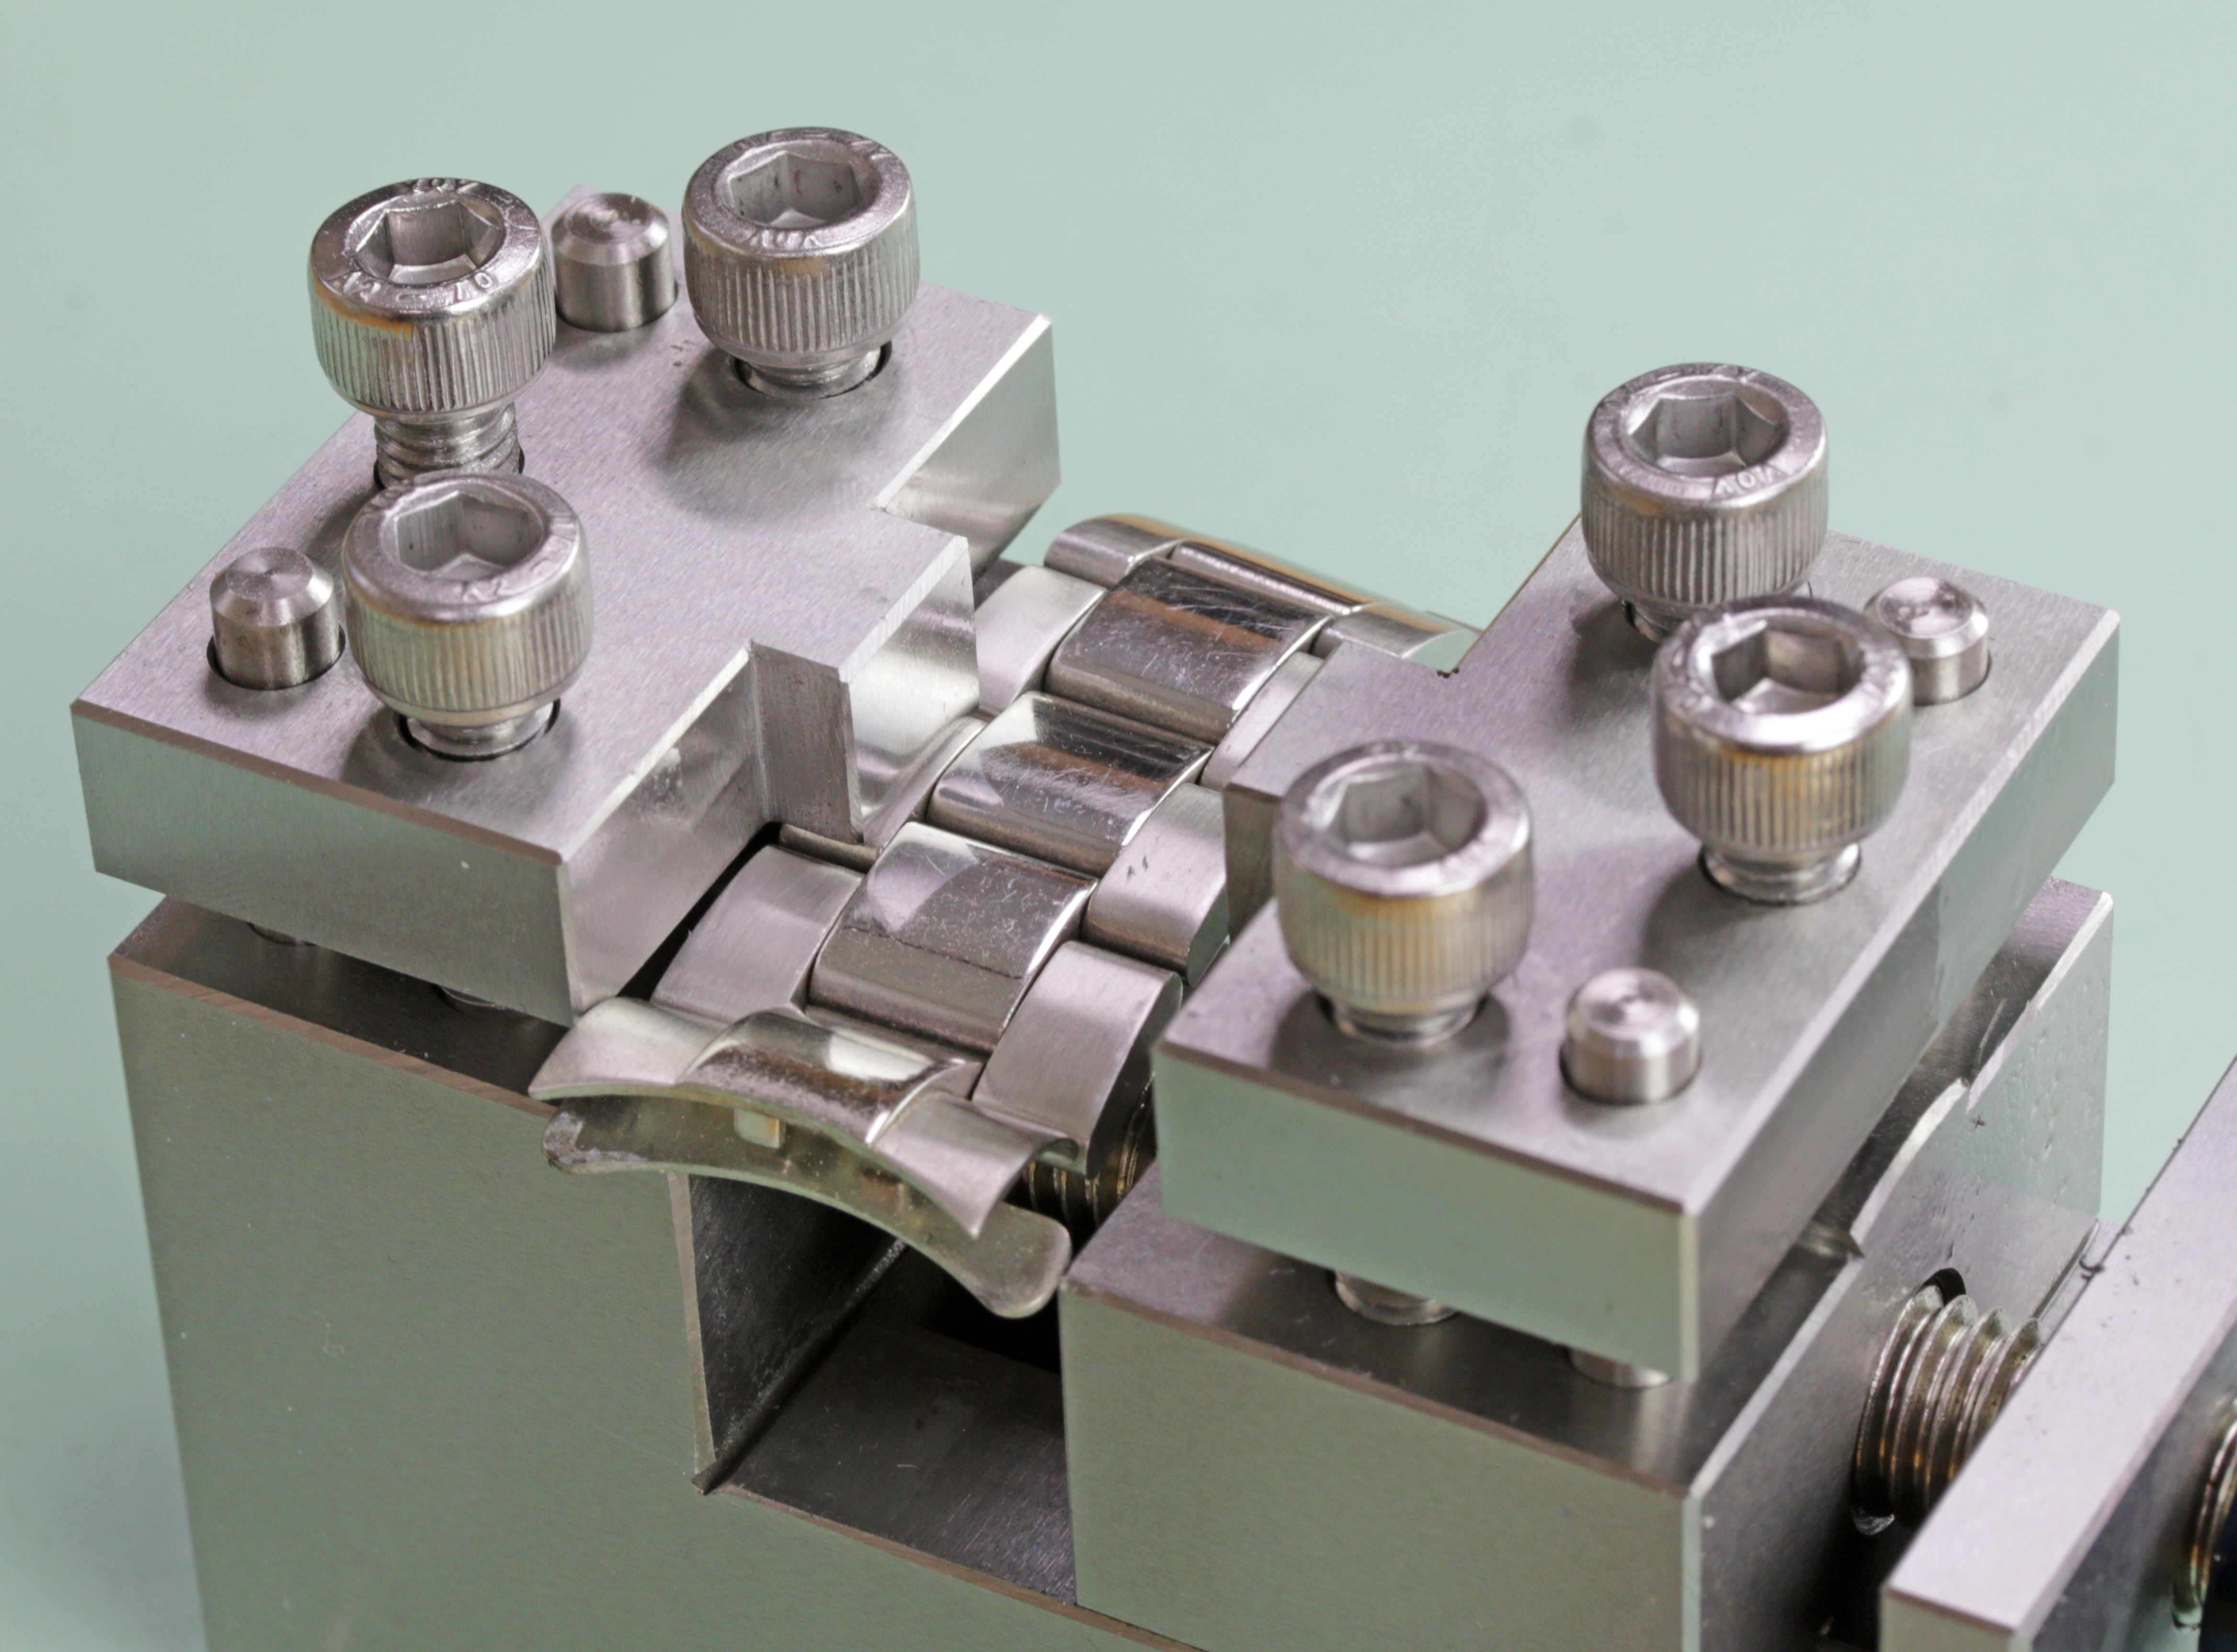
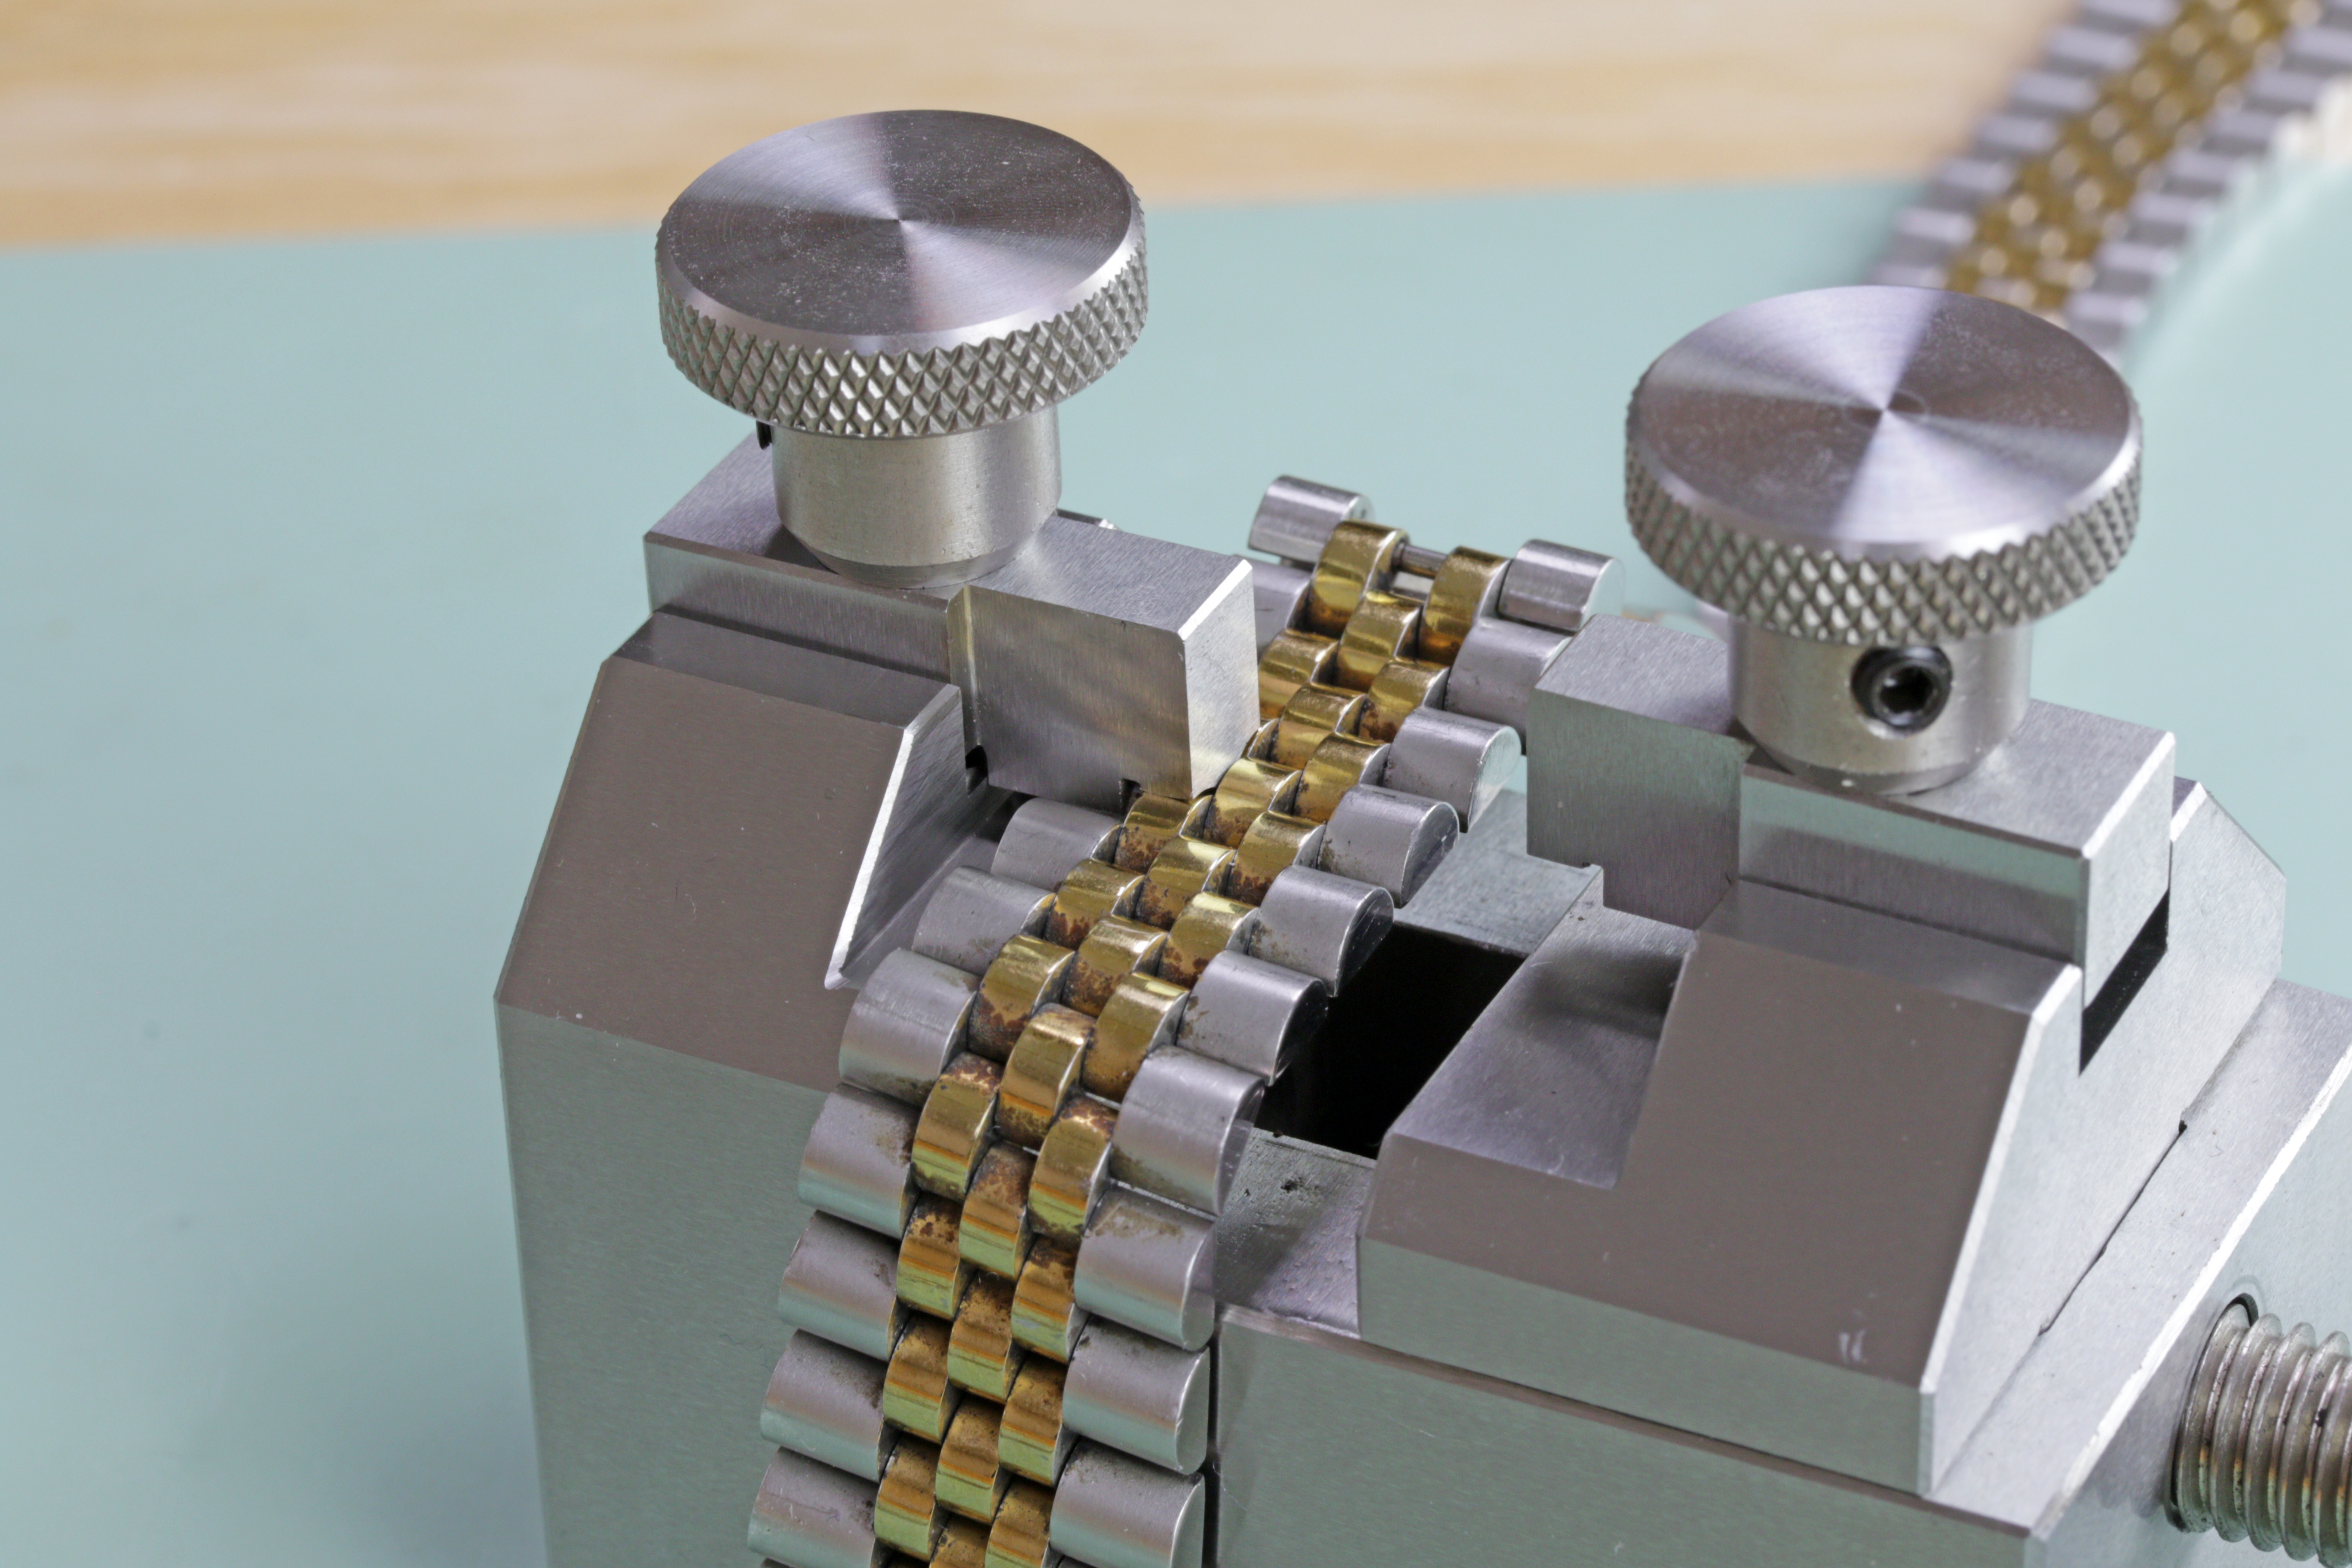
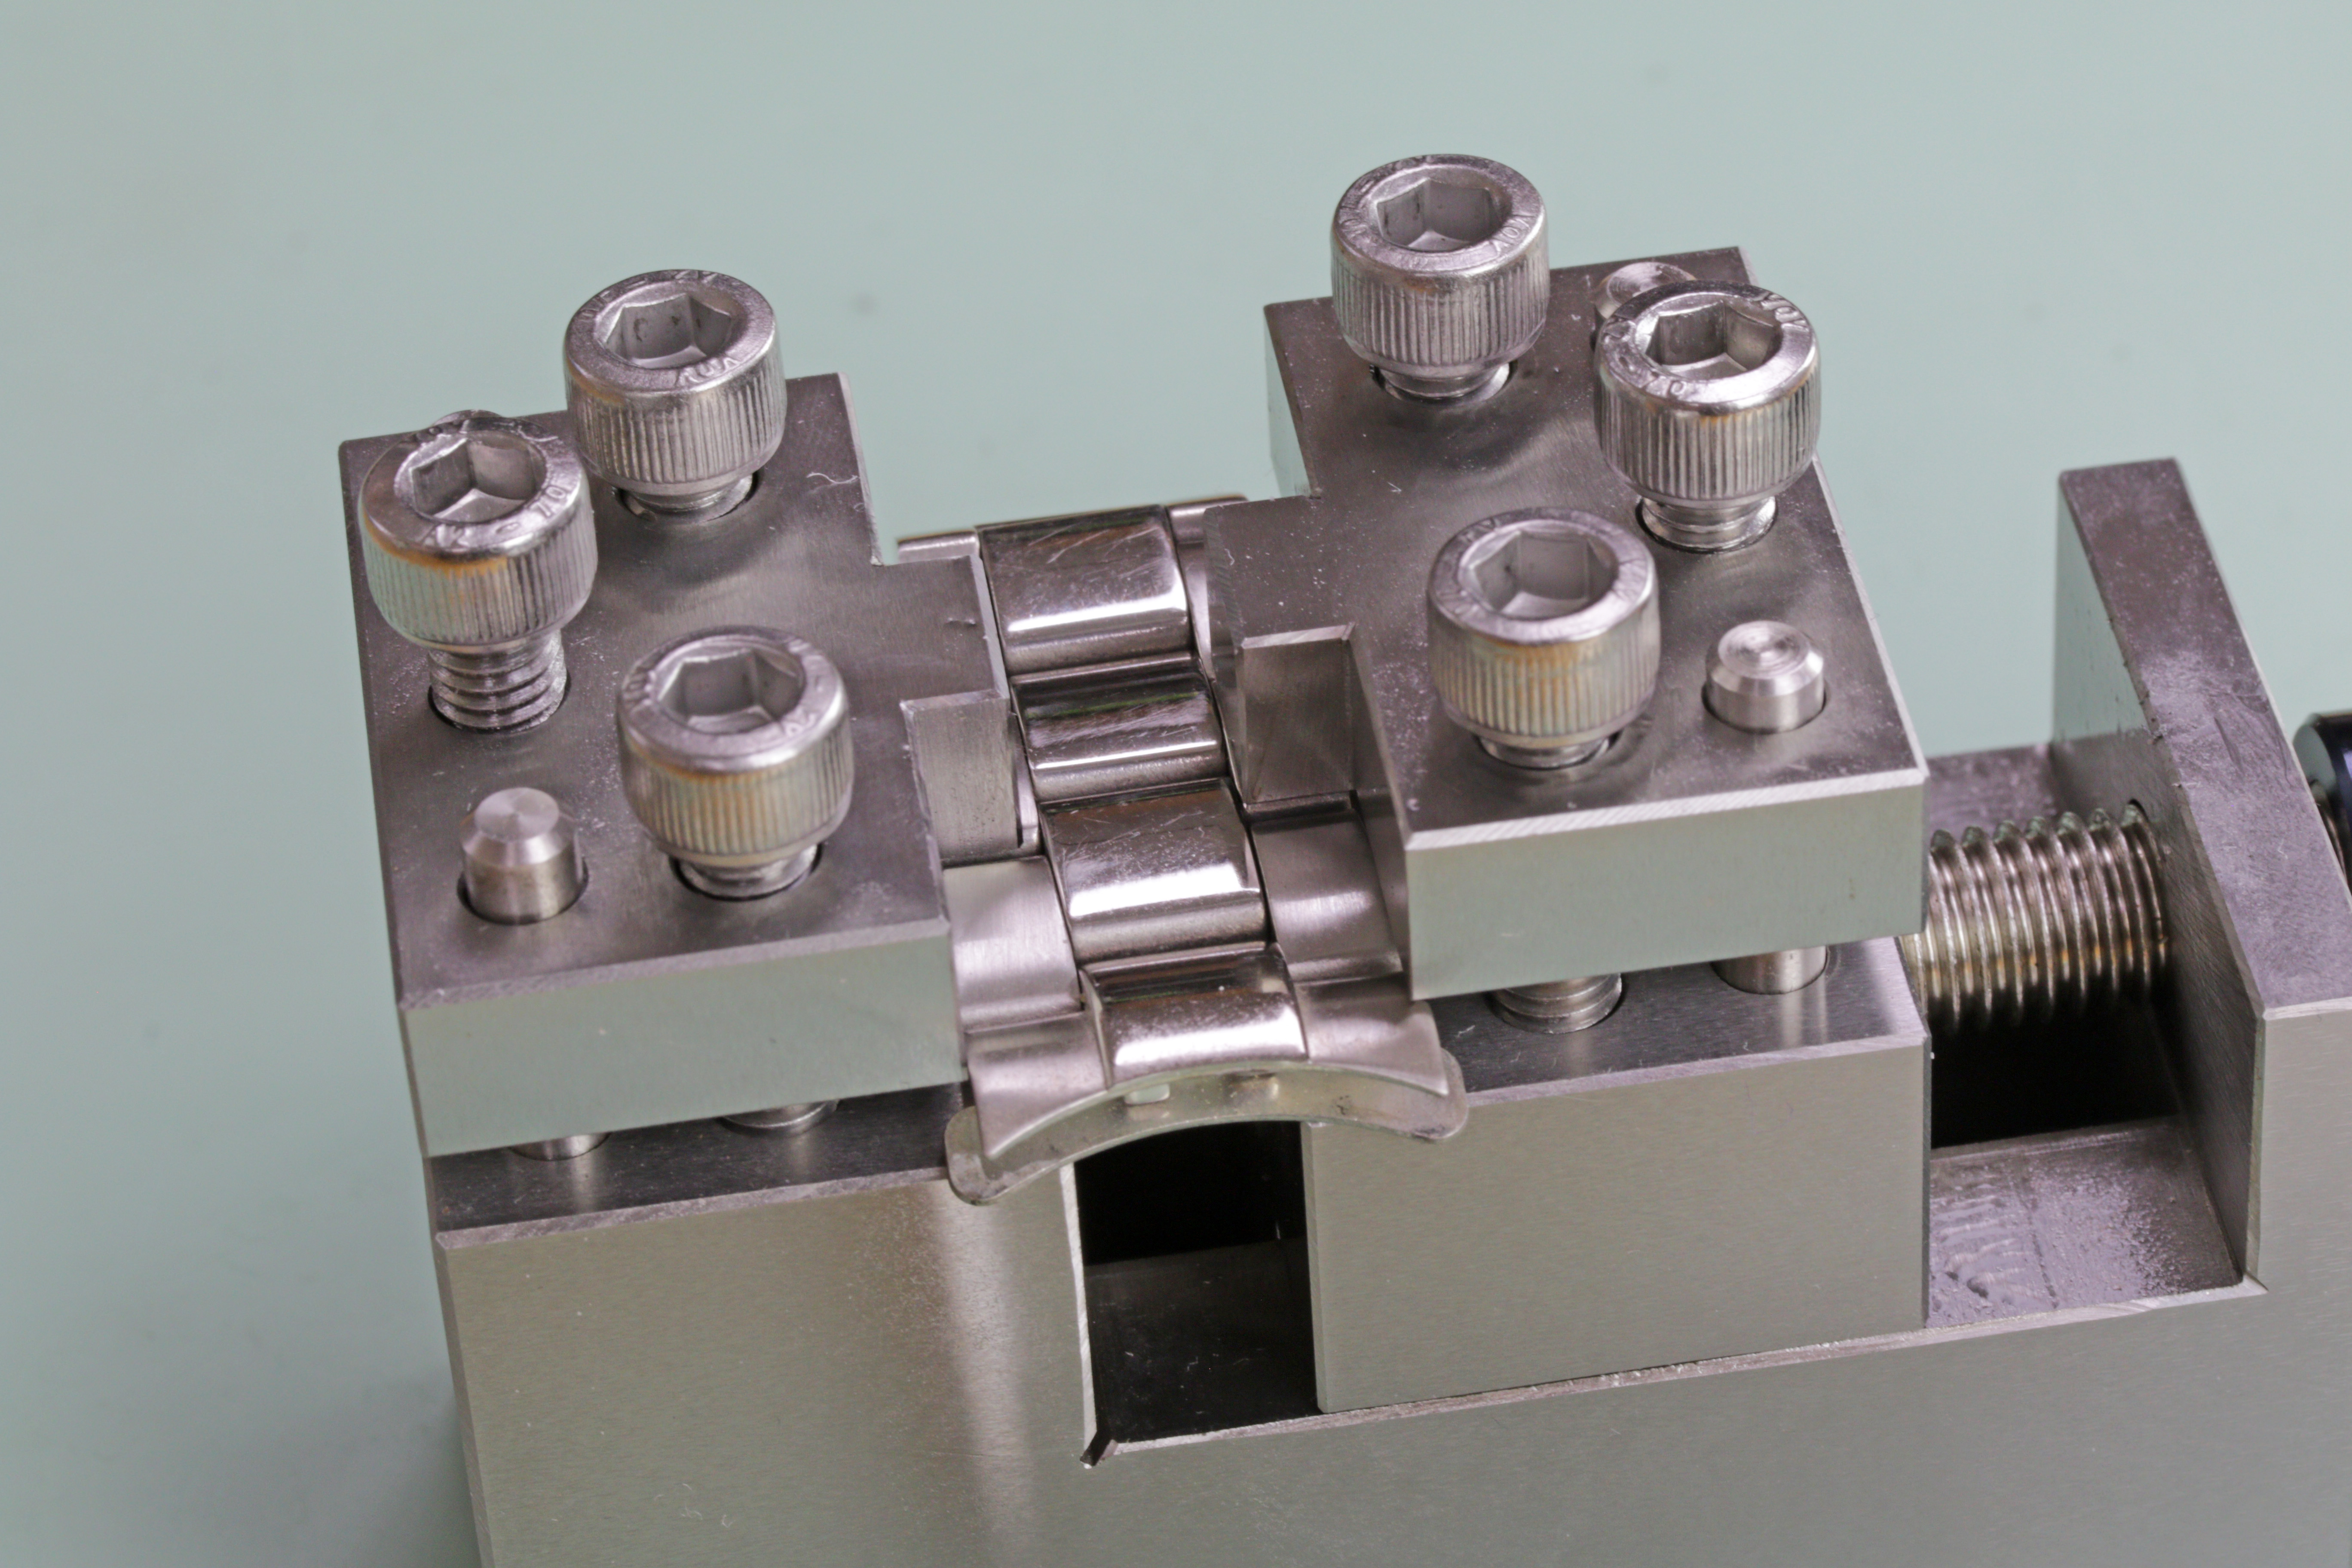
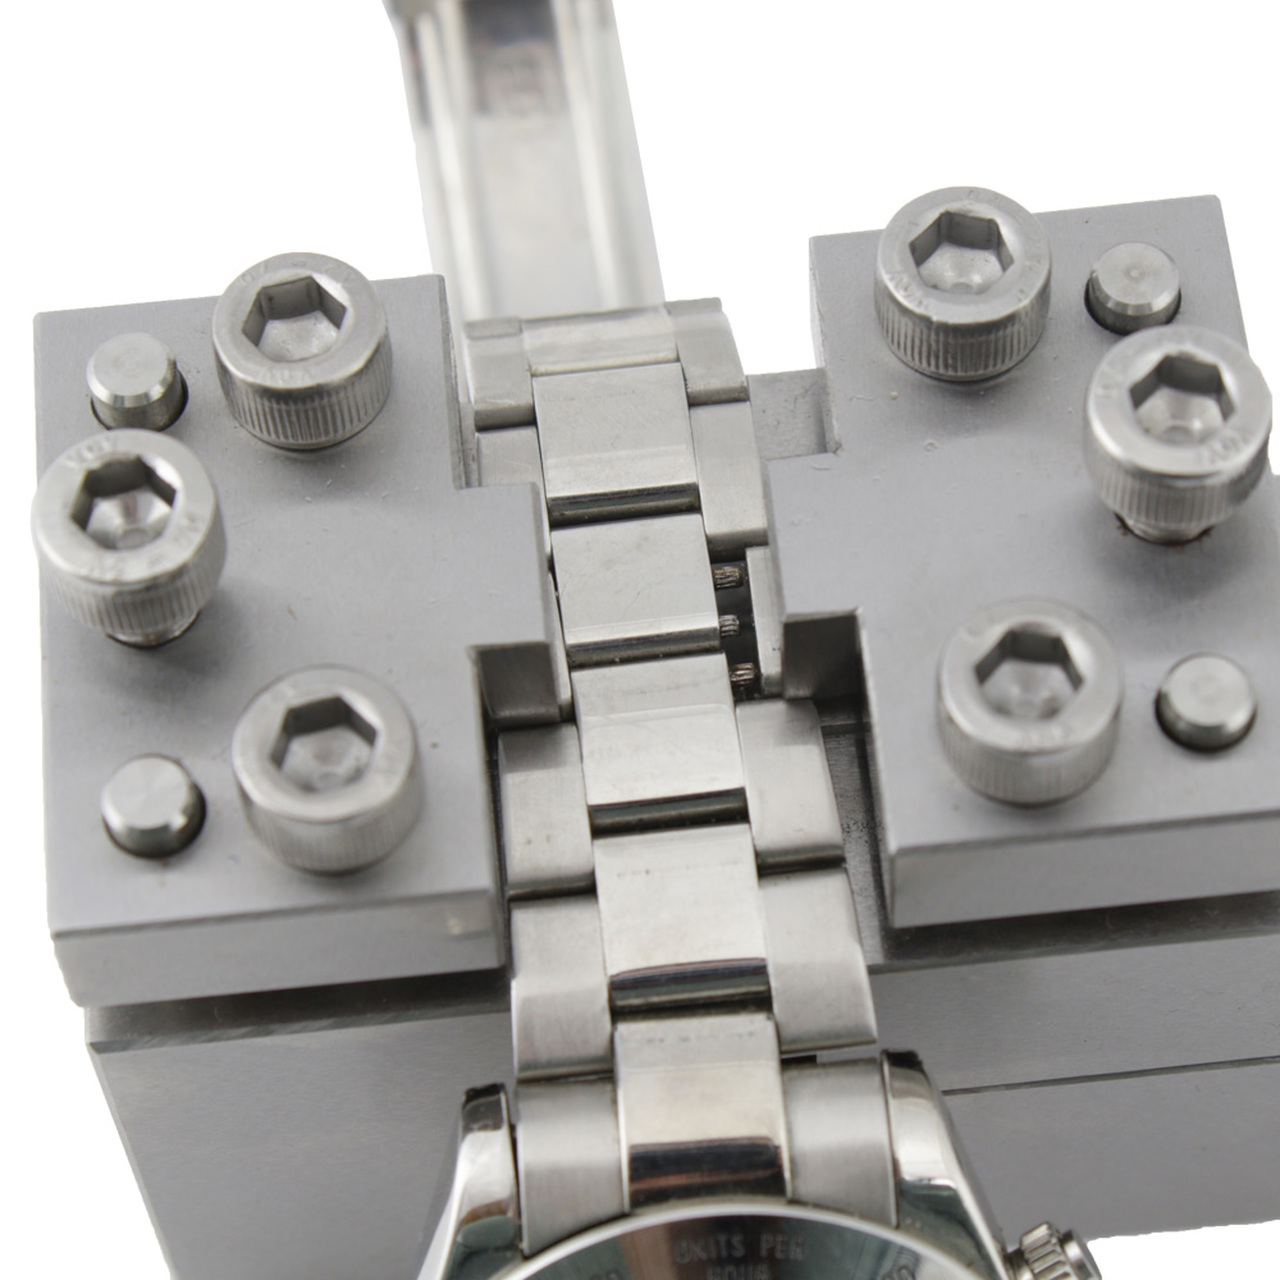
The Oyster link remover tool works by grabbing the outside links with a curved clamp and pulling the link apart to separate the individual link parts. Place the link you need to remove between the clamp on the left side of the tool (when the turning knob is to the right hand side).
NOTE: It is important that you know that not all of the links in the band are held together with pressure fit link pins. The first couple links on the bracelet are held with link screws – you do not want to try to use this tool on those links, they just need a screwdriver to remove the pin.
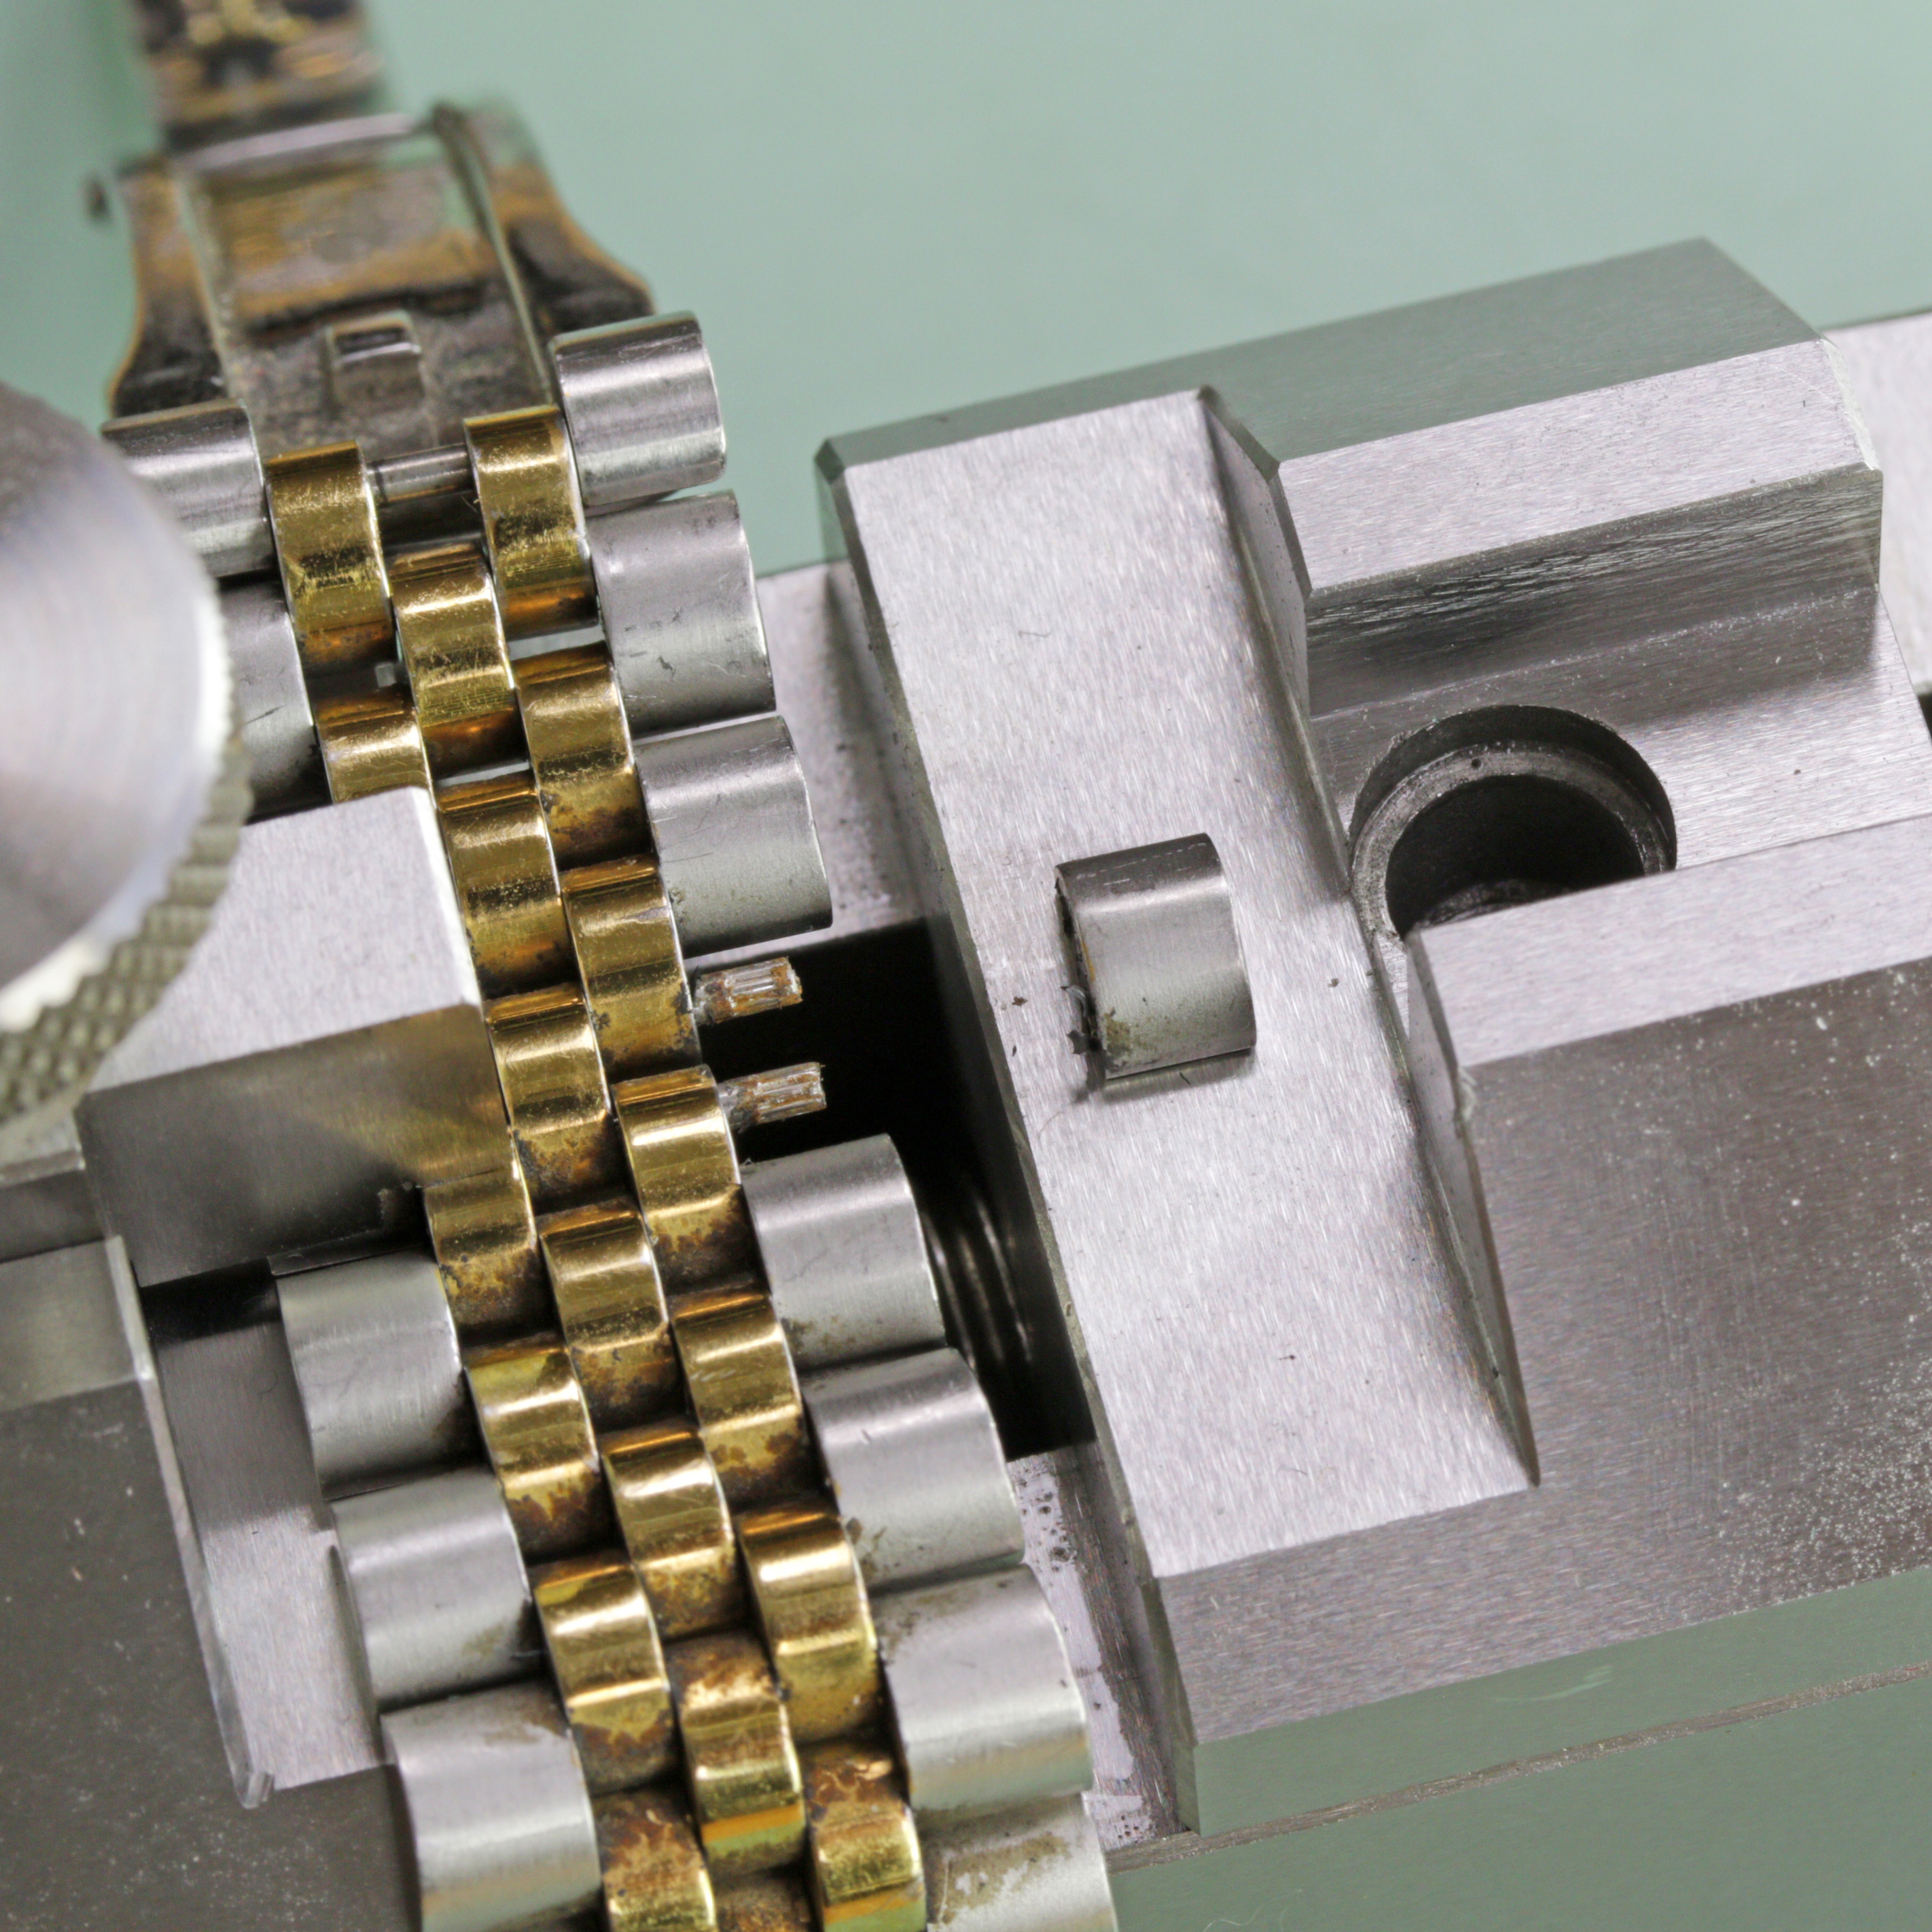
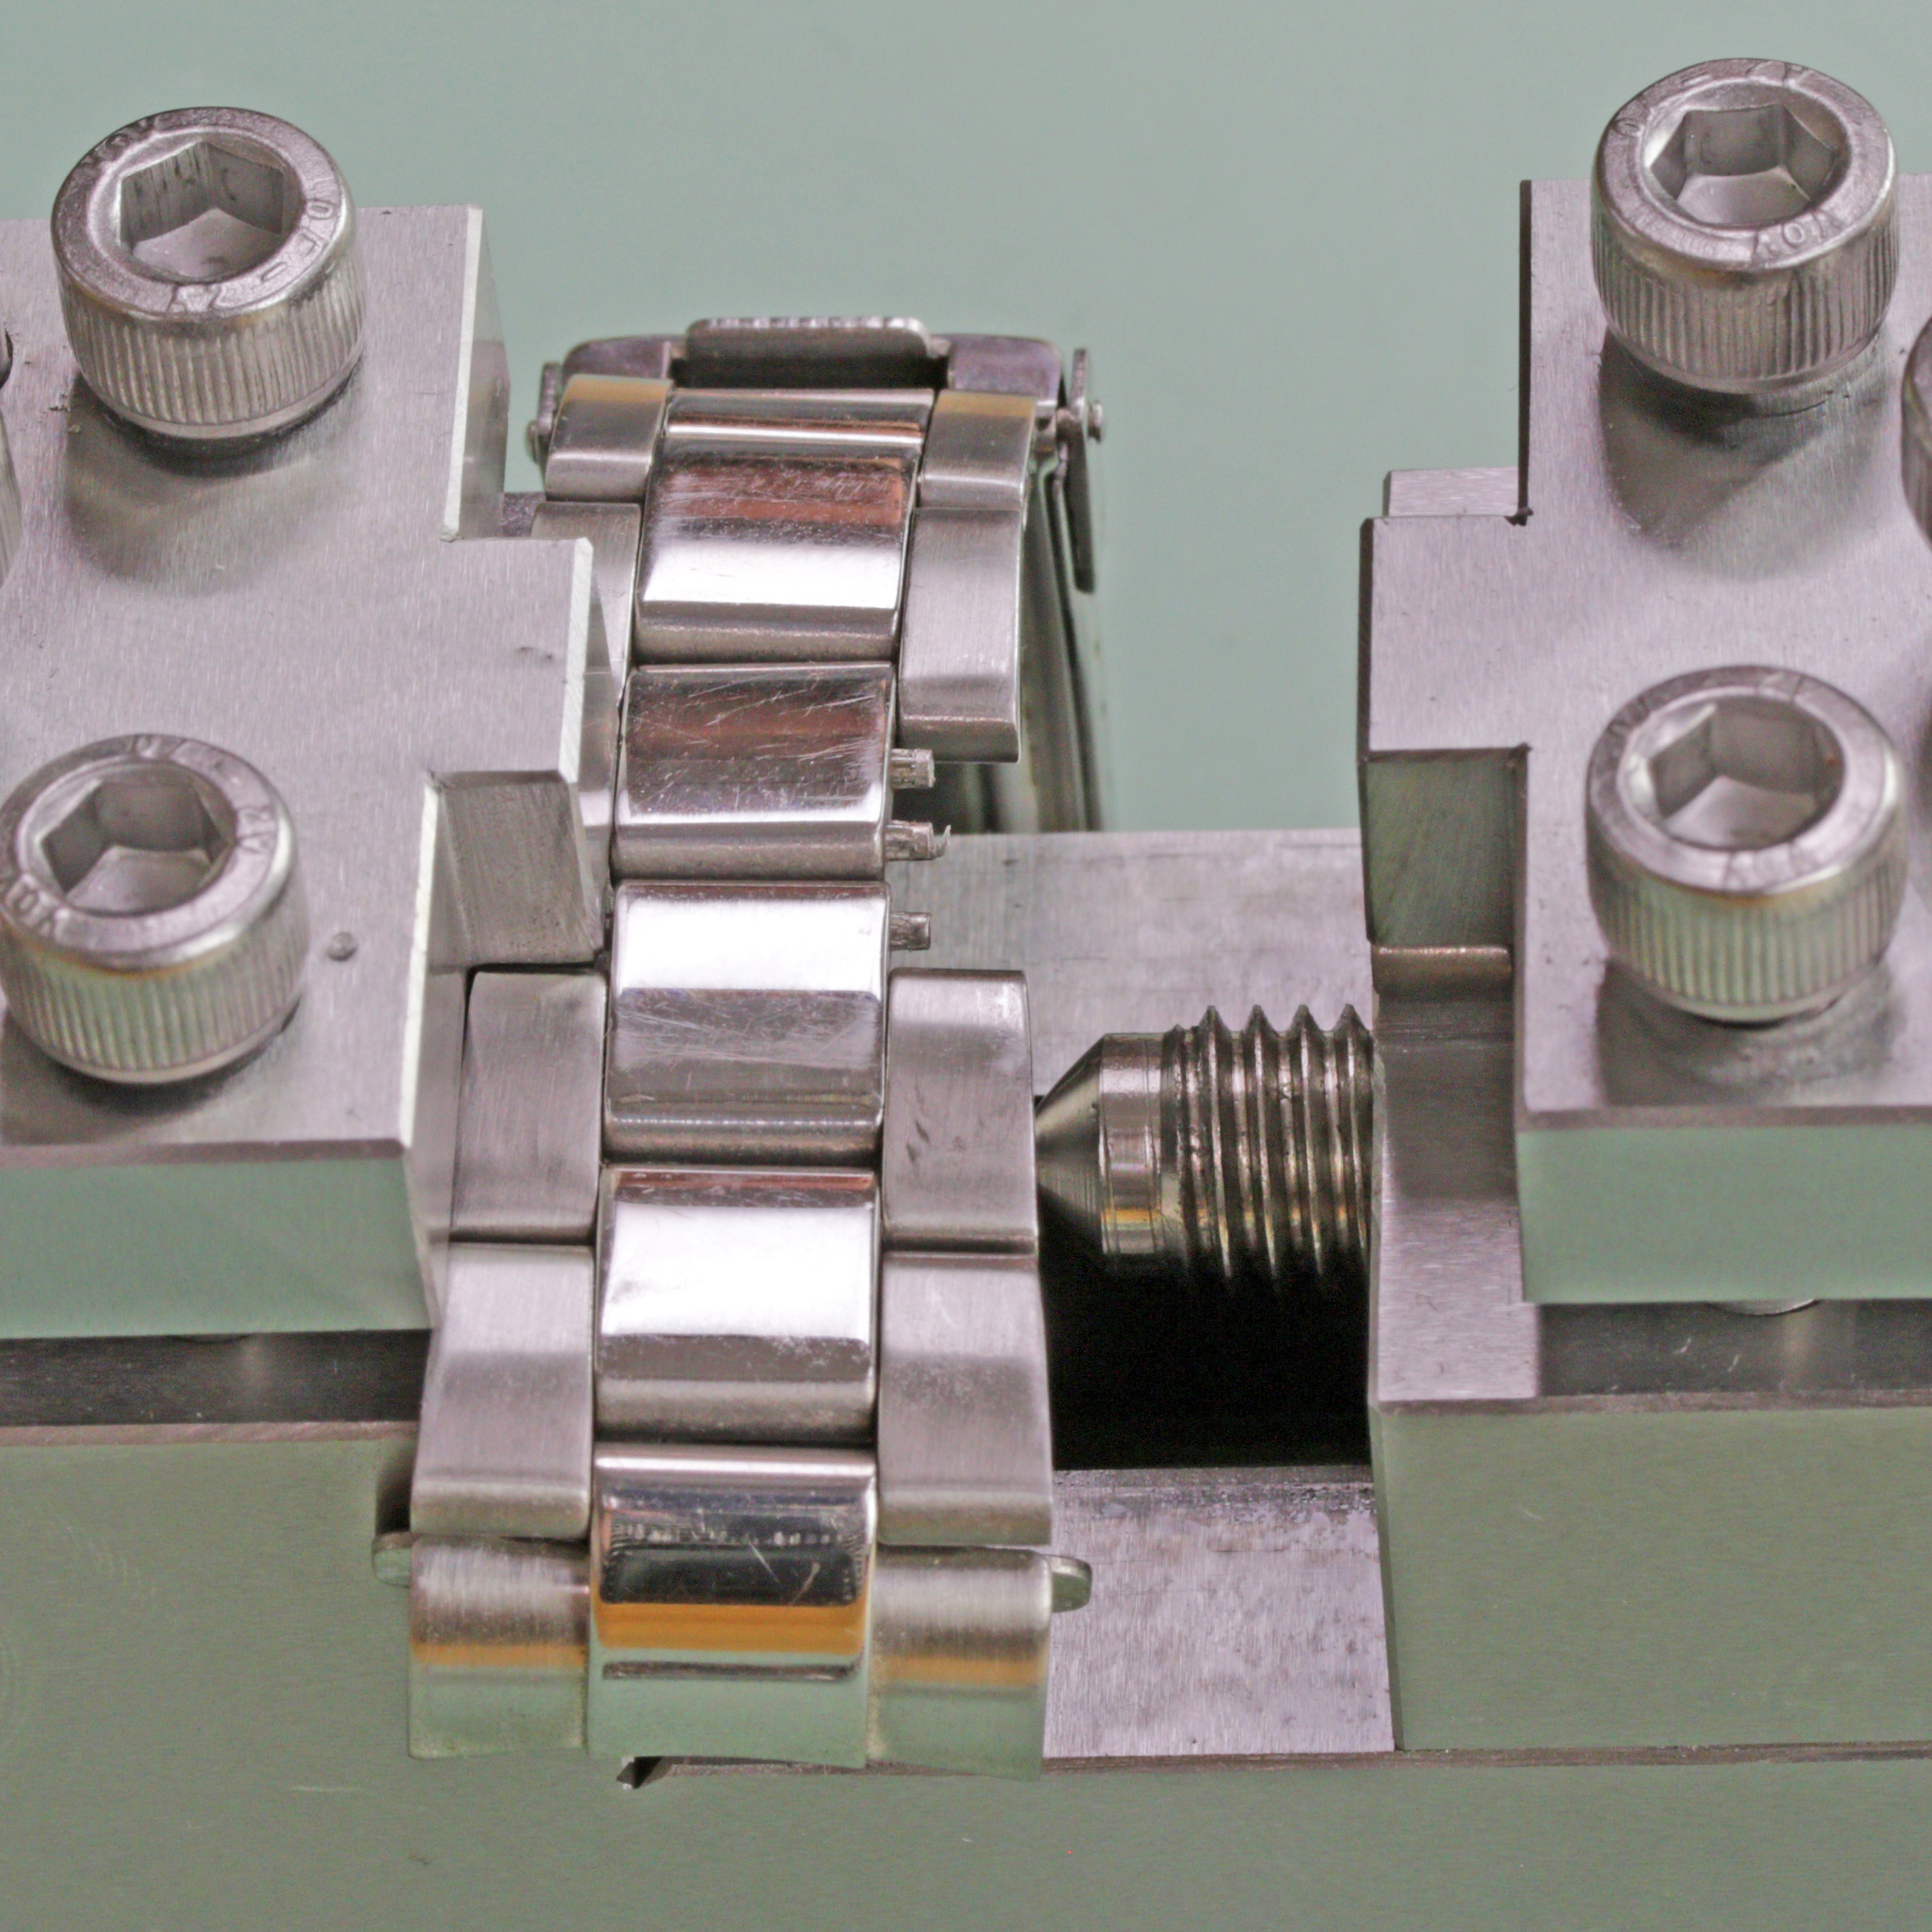
Slide the right side clamp into place over the link that is being removed and align. Using the Allen wrench, begin tightening all six bolts – the two outside most ones will adjust the height of the clamp. When all are securely tightened make a final check with the height adjustment bolts to make sure the tool is tight enough. If the clamps are not tightened enough the tool will slip off the link instead of removing it and may scratch or scuff the bracelet.
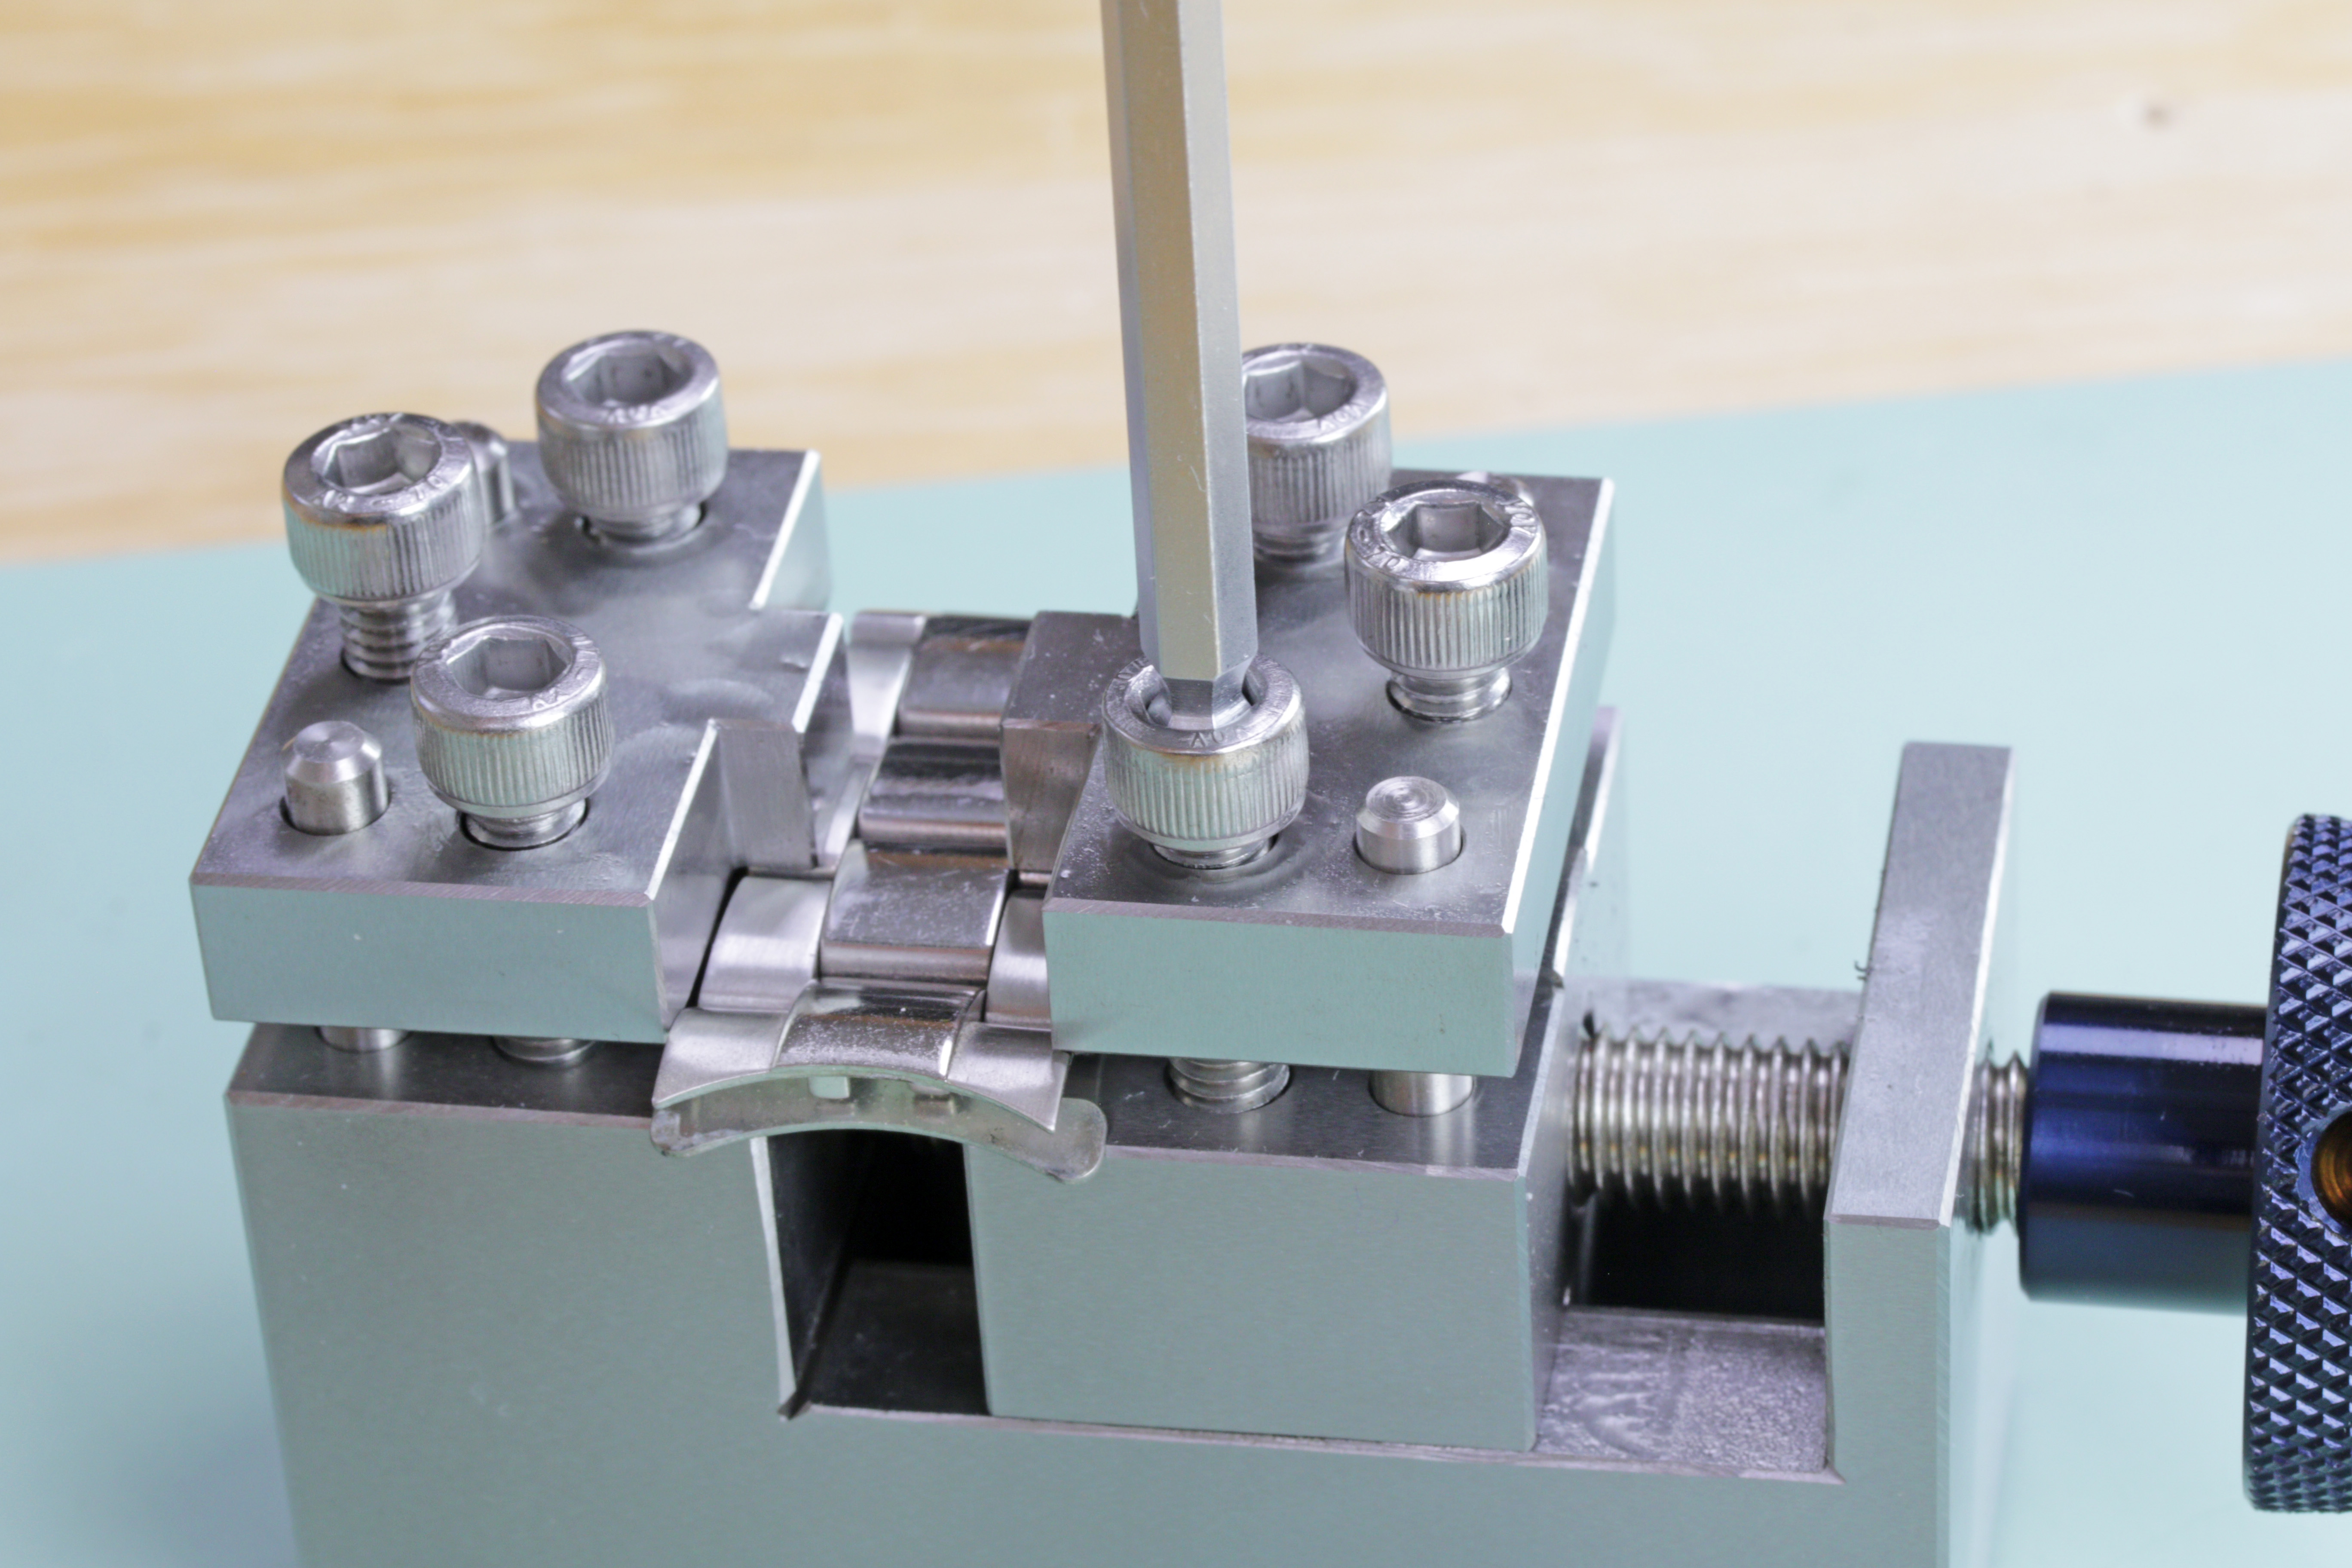
Pull the link apart by using the large blue turning knob until the link end is pulled off of the bracelet. You might need to use the pry bar for extra torque – slide the bar into the holes in the turning knob.

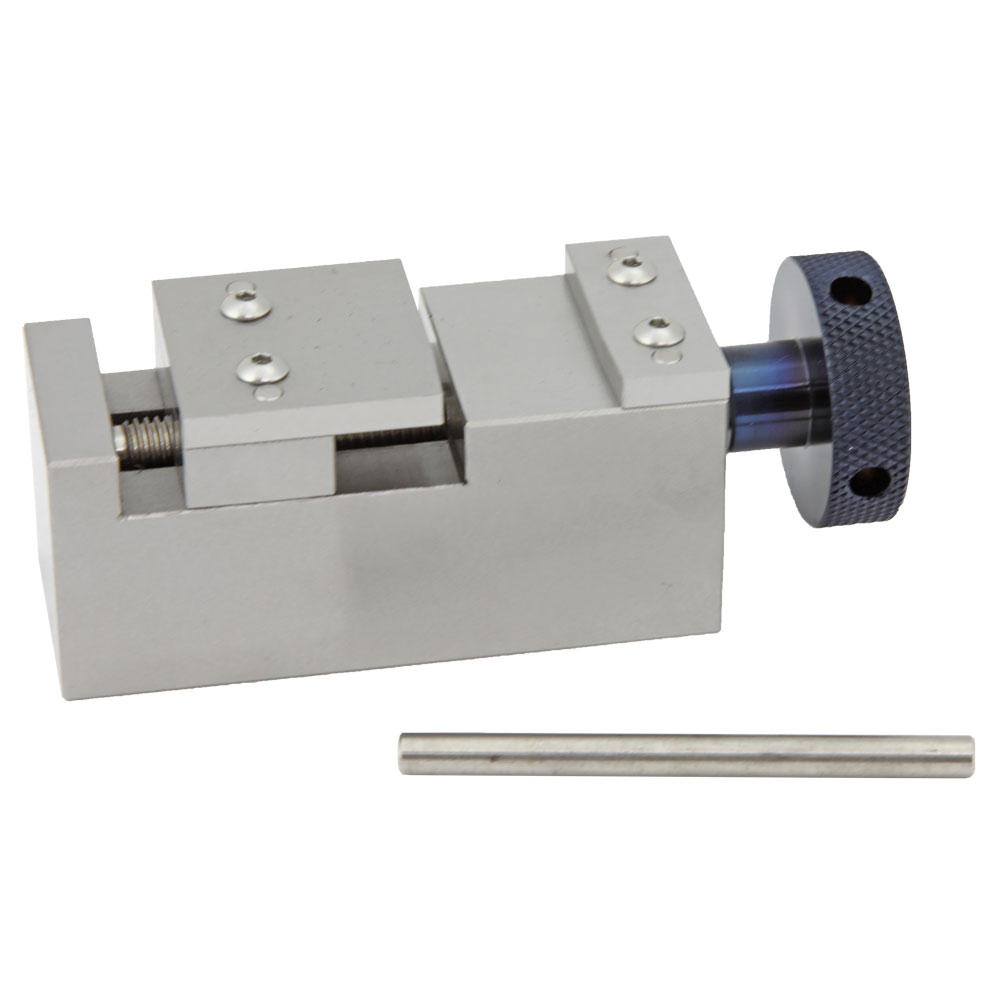
This link fitting tool is a vise that presses on both sides of the bracelet to evenly move the link back onto the pins. Fit the link back into place as much as you can before placing the bracelet into the vise. If the band tapers dramatically, place the band with the loose link in a way that the vise will press on both sides.
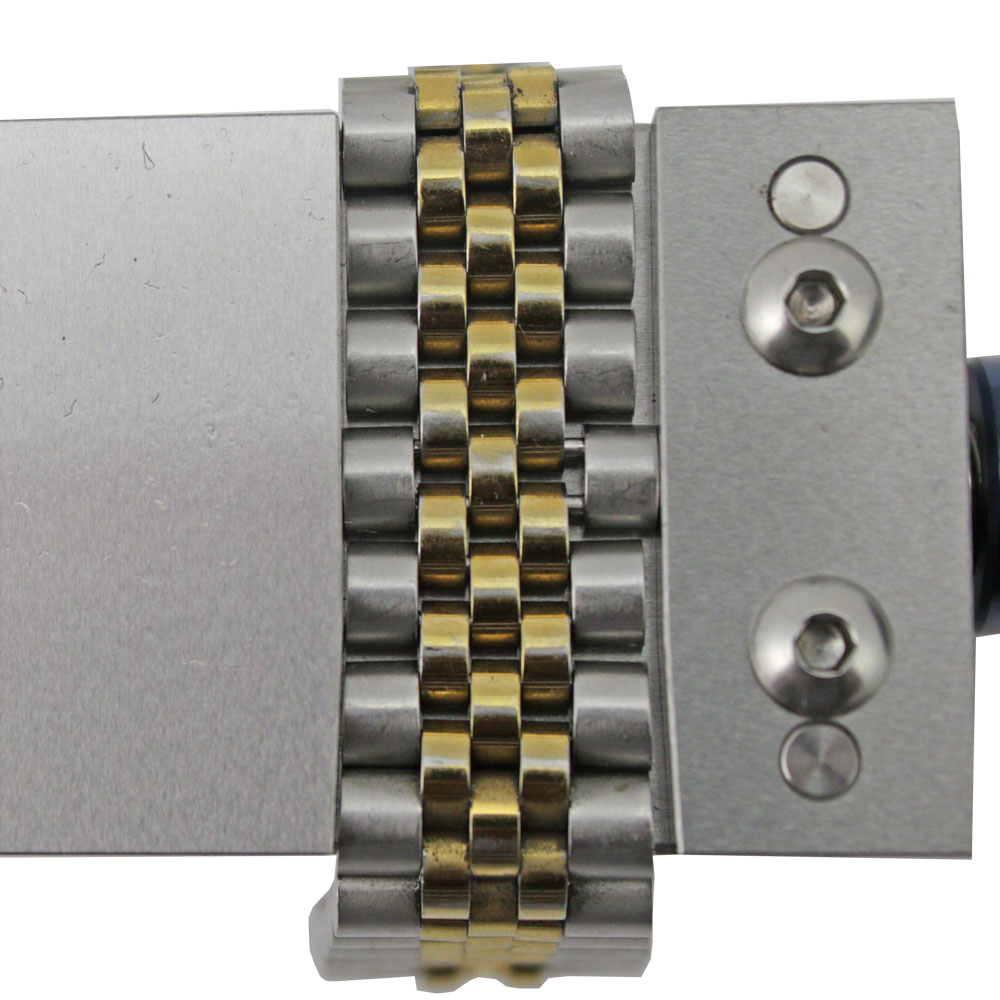

Slide the vise plate until it touches the bracelet and begin tightening the turning knob. When the know won’t turn easily by hand, use the torque bar to make sure the link is securely in place and the turning knob won’t move any more.

I own the tool used to separate the Jubilee links and it is useless. The smallest set of teeth break all the time to the extent that I used four teeth to separate just over half a strap. I got it from a different supplier who sent out new teeth after the first set broke. The strap is still not fixed and I’m not wasting money on more teeth to complete the job. I’d avoid this tool like the plague. It looks good but in reality, it is not functional.
I would take it one step further, For Oyster bracelet, the bottom surface of the link being removed I would lubricate to prevent scratching as the link is sliding across that surface, the topside I would put a piece of leather between the link and vice face which should have a sufficient “grab”, without the risk of scratch, and turn that blue knob s-l-o-w-l-y to ensure link is moving and not sliding across the link surface, it’s all about patience and working slow. It would be nice if you guys could rent these devices, just require a returnable deposit in case someone damages it. I would rent and buy the pin sets.
For the Oyster Bracelet, I think with minimal enhancements, you can use the puller tool as a pushing Tool to push links back together once pins have been replaced, instead of spending another $300 on a separate tool. Fashion a bottom plate, and face plates opposite turn now becomes a pushing tool.
All well and good but many of the pins in the bracelet will be so thin that they break , then what do you do ?!
Drill out the old pins and then find new ones that have to be thicker than the originals and where do you get those from !
Not easy
Great tools we use to send them to a jeweler and now we can size bracelets in house.
I am working in steelex horoligical manufacturering of watch chain process of wheel ,soap for rough,fiber and final cloth soap, finish chains we find mopline or hairline of final polish how to remove please guide