When it comes to stringing or restringing a necklace or bracelet, there are many techniques that you can use. Below is one of the simplest and will work with most any jewelry design or set of beads to create beautiful beaded jewelry. For an overview of common beading tools and there uses click here.
Step 1
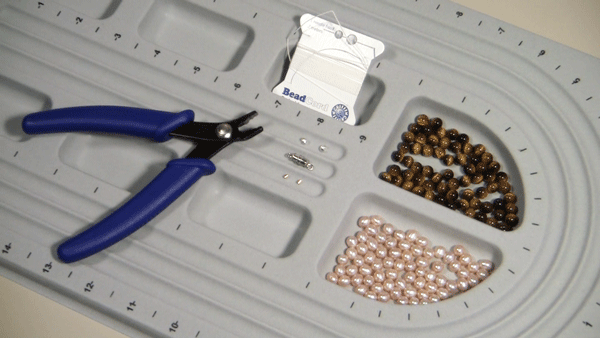
Once you have an idea for a new piece of beaded jewelry, or you have a piece you need to restring, take the beads you have and lay them out. To do this, use a flat and soft surface like a towel, piece of fabric, or bead board to keep your beads from rolling away and getting out of order.
Step 2

Now, before you can get started, you need to cut a piece of bead cord long enough to string your necklace or bracelet. To figure out how much bead thread you need, determine the finished length you want your piece and add about six inches to that length and then cut the cord.
Step 3
Before stringing any beads on your piece of bead cord, tie a knot at the end opposite the one you will use to thread through the beads. To ensure that your knot is secure, use a bit of craft glue on the knot to hold it closed. Only a small amount of glue is needed.
Step 4
String a bead tip (also called a bell tip) through the unknotted end of the bead cord. Pull the bead down the cord until the knot rests in the cup of the bead tip, covering it from view.
Step 5

Then you can string your beads onto the bead cord in the order that you prefer. If you are using expensive beads or beads that might rub together and damage each other, you can tie a knot between each bead for added security.
Step 6
Once all the beads have been strung, thread your second bead tip onto the thread with the cup part facing the end of the bead cord (facing away from the beads).
Step 7
Tie a knot in the threading end of the bead cord, as close to the bead tip as you can. Secure this knot with craft glue, like you did for the first knot, and cut off the excess string before hiding the knot in your bead tip.
Step 8
Slide one end of your clasp onto one bead tip hook, and then using jewelry pliers close the hook so the clasp can’t slide off.
Step 9
Repeat Step 8 with the second half of your bead clasp and the other bead tip.
Visit Esslinger.com’s Learning Center for more useful beading guides.
Tips:
- When restringing a necklace, if you can, keep the beads on the original string as long as possible to retain the original design.
- A typical necklace is usually 18 – 20 inches long, and a choker is usually 14 – 16 inches long.
- With some softer thread it helps to spread a bit of craft glue at one end of your thread to make threading the beads easier.


This will make work so easy! thanks
Thanks for sharing this blog for us.
Your designs are very awesome.