
Just as people need their rings made larger to accommodate for changes in their hands like arthritis or weight gain, people also will need their rings made smaller to accommodate similar changes. While this article will explain how to size a ring down a half size, it is easy to size it down more following similar principles.
Step 1
Clean the ring, taking into account the stones and any special care they may need. Then, check the ring to see if it has been sized before using visual examination and heating or iodine testing. This will determine if there are any other special considerations to be taken into account before beginning to size the ring.
Step 2
Most mandrels have a small gauge that is used to measure the distance between ring sizes. This gauge will appear as a set of marks the run up the length of the mandrel. With a pair of dividers mark the size of a half-size on the gauge, this will be an approximation because most gauges are only marked with whole size increments. If you don’t have access to a mandrel gauge, or wish to be more exact, set the dividers at 1.3 mm apart using a slide caliper or metric ruler. (The actual measurement is 1.27 mm which is one half of 2.54 mm which is the size of one ring size.)
Step 3
What you have just measured out is the amount of metal that needs to be removed from the ring to change the size by one half. Now you must transfer this measurement to the ring. Take the dividers and firmly pull them across the metal in the center of the bottom of the shank. You will be removing the metal that lies in between the two lines that you just drew on the metal. If there is a seam from a previous repair in the ring, make sure that the seam lies in the section that you will be removing.
Step 4
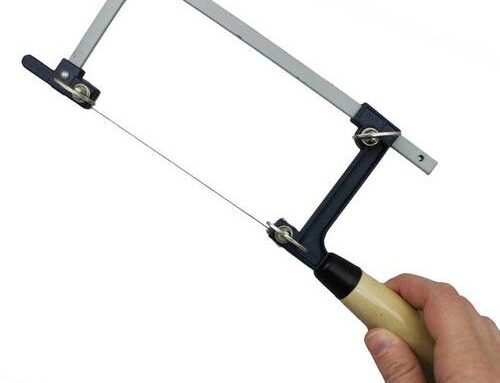
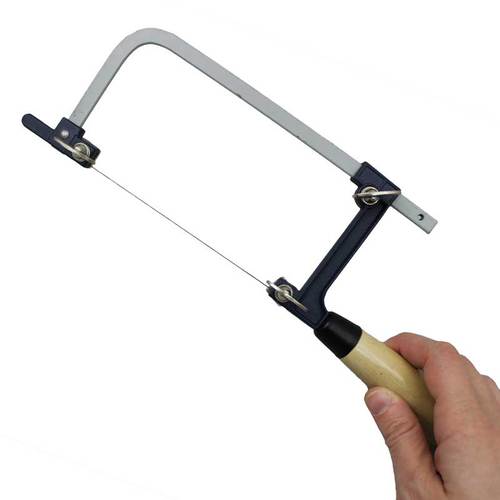
Brace the ring against your bench pin for stability and using a 3/0 saw blade, make two straight and parallel cuts where you drew the lines. At this stage, each cut should be about halfway through the shank, creating a bridge. This bridge will help create a stable sawing environment as long as possible for you as it keeps the ring intact. Alternate cutting between the two cuts until you have completely sawed through the shank. Save the little piece of metal that falls out for your customer or recycle it depending on your policy.
Step 5
Next you will want to close the shank by alternately bending each side until they meet. To accomplish this, use a pair of ring bending pliers that have copper jaw protectors. If the ring is not completely round when you finish bending the sides in, that is alright at this point. As long as the two ends meet well, you are ready to move to the next step.
Step 6
Now we will prepare the ring to be soldered back together. Solder flows best when the ring is clean and grease-free. To ensure that the ring is completely clean, take an abrasive pad and brighten the shank around the seam.
Step 7
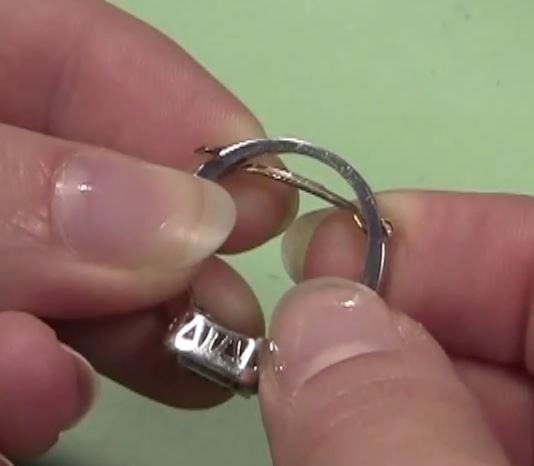
Hold the ring up to the light so you can examine the seam. Make absolutely sure that you can not see any light shining through the seam. If you can see even a sliver of light, saw through the seam and realign the ends. Then repeat steps 5-7.
Step 8
Take a fine sable brush and use it to apply flux to the seam. If the ring has never been soldered before, use hard solder. If there are previous solder joints, use a solder with a lower melting point. Next you want to spring the seam open; you can do this with your fingers or by sliding it up a ring mandrel. Use same brush that you used to apply the flux and pick up a piece of solder. The piece of solder should be no larger than the cross-section of the shank at the seam. Slip the solder in place and then let the ring close on it. This is the simplest method of joining a ring shank, called tension soldering.
Step 9
Before beginning the next step, you need to take into account the stones that are in the ring. Many materials, like pearls, cannot take heat and must be protected from exposure to it. Take the necessary precautions before continuing with this repair.
Step 10
Now, you will use a hot oxidizing flame to heat the localized area around the seam on the shank. Using an intense flame lessens the amount of time that the ring must be exposed to the heat. By moving the flame from side to side you ensure that you will equally heat each side of the shank. To raise the temperature of the metal as quickly as possible and avoid oxidation, keep the flame on the metal. Once you see the solder begin to flow and re-join the shank, remove the flame and quench the heated area.
Step 11
Just as some stones cannot be heated, some can’t be put in the pickle either. Be aware of this before you place the ring in the pickle to clean it. If the stones cannot be in the pickle, hold the ring by the setting so that only the shank rests in the pickle. After a minute, remove the ring from the pickle, rinse and dry it.
Step 12
Now you will round the ring. Slide it onto a mandrel and with a mallet; carefully tap on the shank to round it out against the mandrel. Check the size. The ring will be a tiny bit smaller than what you were aiming for. Tap harder on the shank to stretch it a little, if necessary.
Step 13
This is the point where you begin to finish the ring. Starting with the areas that are no longer polished, refinish them using abrasives that get progressively finer. Use a smooth scraping motion with the spinning drum. Be sure to maintain a uniform thickness and shape. To avoid overly abrading one area, keep the tool moving and inspect your work often.
Step 14
You can use sanding drums on the outside surfaces of the ring, but it is better to use a tool that makes the most surface contact with the area you are working on. Therefore you will achieve much better results by using a flat sanding stick at this point in the finishing process. Again, move from coarser grits to finer grits. Use the longest strokes possible while avoiding areas that areas that are still polished. Be sure to monitor the precise thickness of the shank continually during this process.
Step 15
Now you are ready to buff and polish the ring. Here you can use a polishing lathe or a flexible shaft machine, depending on the needs of the ring you are working on. Start with the inside of the ring and then move to the outside surfaces using a buff with a cutting compound. Once you have done that, rinse and dry the ring and repeat those steps with a red rouge to create a high luster on the shank.
Step 16
Finally, clean the ring once more to remove all traces of the polishing compound. The ring is now finished.
Leave A Comment