
 Sometimes your watch band clasp will wear out before your mesh watch band does. If you don’t want to replace your whole watch band, or you can’t because of its unique design, you can always just replace the clasp itself. Use this guide to learn how to change fold over style watch band clasps for mesh watch bands.
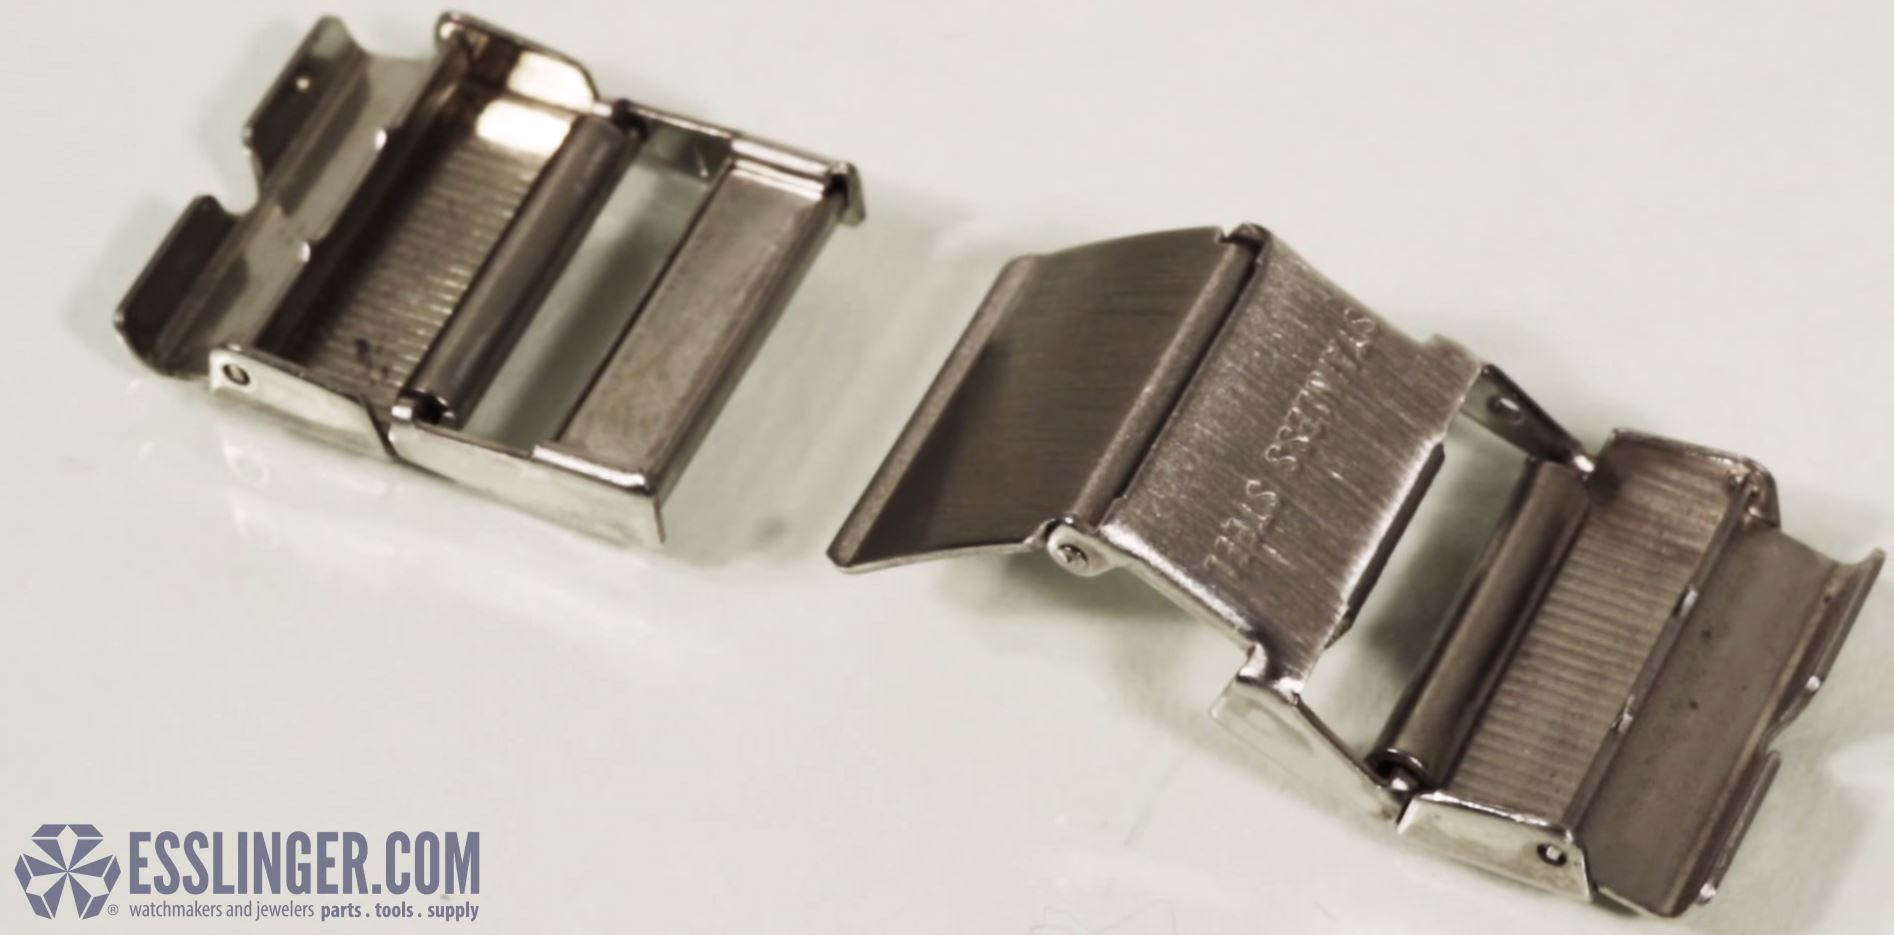
How will you recognize a fold over clasp for mesh watch bands? Simple: first check your watch band and see if it is all one solid piece attached the watch case like this, be aware that not all mesh watch bands look like they are made of mesh. And second: look at the clasp, it should have two solid end caps that appear to grip the watch band with a clasp in between that folds over on itself like a center catch clasp.
 Tools Needed:

- A spring bar tool
- A digital gauge
- A flathead screwdriver
- A jeweler’s ball peen hammer
- A fold over style watch band clasp
- And a notepad and pen
Step 1
 The first step in replacing a watch band clasp is to remove the old clasp. Start this process by opening the clasp so that it is fully extended and you can easily access the points inside the band where the clasp attaches to the band. Then hold the watch band in your hand so one end of the clasp is facing toward you and you can see the small opening in the solid end piece. This gap should be located on the underside of the band, in the middle of the edge that is closest to where the clasp articulates.
Insert the pointed end of your spring bar tool into the gap in the clasp end piece and apply pressure to pry the end piece open. Once the cover pops free, you can set your spring bar tool aside and lift it all the way open. Then grip each side of the end piece and slide it off the end of your mesh watch band. Set the end piece aside if you can, otherwise, if the clasp is connected together by a security chain, just let the first end piece hang from the other end.
Step 2
Turn the watch band around so you can see the gap in the remaining attached end piece of the clasp. The top of the watch band and the crystal should be facing down for you to see this gap. Take your spring bar tool again and insert the point end of the tool into gap of the end piece. Use the tool like a lever to pry the cover open and release the grip on the watch band.
Again, once the cover has popped open, lift it all the way up and then grab either side of the end piece and slide it off of the watch band.
Step 3
Set the old watch clasp aside and lay the watch band out so you can use your digital gauge to measure the outside width of the band to order a new watch clasp.
 Step 4

Position the jaws of your digital gauge on either side of watch band at the loose end where you intend to place the new clasp. This is particularly important for watch bands that taper because they can be very different widths at each end of the band. Close the jaws until the rest securely on either side of the watch band. Repeat the measurement at least twice to verify your results before recording the measurement.
Then, using that measurement, order the correct size replacement watch band clasp for your band. Remember to choose the metal color that best matches the style of your existing watch band.
Step 5
When you get your new clasp, you’ll want to open and close both end piece covers, as well as the clasp to make sure they are all functioning properly before you put it on your watch.
After you’re sure that all the moving parts are in good working shape, you are ready to attach the clasp to your band with the end pieces. Start by taking your new clasp and opening it so both sides are only attached by the safety chain. If you are working with a large gents clasp, larger than eight millimeters, it will most likely not have a safety chain at all and you can just set one side of the clasp aside for later.
Step 6
Starting with the end piece attached to the tongue or clasping side of the watch clasp, open the end piece cover with your spring bar tool like you did with the old one when it was attached to the watch band. Set the clasp down.
Take your watch band and determine which side you want the clasping mechanism to be on. Traditionally, the clasping portion is attached to the six-o’clock part of the watch band to be easier to clasp, however you can attach it to whichever side is most convenient for you. Hold the watch band so that the outside side of the band is facing up.
 Step 7

Grab the tongue end of the clasp and hold it so that the gripping cover of the end piece is hanging down and there is an opening between the two parts of the end piece. Insert the loose end of the watch band into the opening in the end piece and turn both pieces over so that you can see the inside of the end piece and the back of the band. Push the end of the band as far into the end piece as you can while still ensuring the cover of the end piece will close.
Step 8
When you are satisfied with the position of the watch band in the end piece, you can set the watch band down and close the cover piece. This will cause the teeth at the opening you slid the watch band through to turn up into the band and grip the band, keeping it from coming unattached from the clasp. Since these end pieces grip the band securely, you most likely will not be able to push the cover completely closed with your fingers alone. We recommend you use a couple tools to help you close these strong clasps. Take your flat head screwdriver and lay the blade flat across the end of the cover nearest to the side that is still open. Make sure that the sharp edges of your screwdriver blade are not facing toward the clasp itself, this will ensure that you will not scratch or mar the end piece as you close it. Then, take your small ball peen hammer and pound steadily but gently on the screwdriver blade to push the cover completely closed. After you here the click of the cover snapping into place around the band, you can set your screwdriver and ball peen hammer aside.
Step 9
Next, take the remaining loose end piece of the new clasp and open the cover portion with your spring bar tool like you did before. Before you start to connect the end piece and band together, make sure that the end piece is in the same position as the other one and check to see that the safety chain is not twisted or tangled. If it is, you will need to straighten it out before connecting the remaining loose ends together if you want to be able to wear your watch comfortably.
Step 10
Repeat Steps 7-8 and hold the loose end piece up so that the open cover piece is hanging down and the opening is visible. Lift up the loose end of the watch band and bring it to loose end piece, inserting it into the opening. Be sure that the outside of the watch band is facing up, the same way the clasp is. Once the band is inside the end piece, turn it all over so that you can see what you are doing. Then, insert the watch band as far into the end piece as possible, like you did before.

Lay the band down on your workspace and close the end piece cover like you did before to activate the teeth the keep the watch band securely inside the end piece. Place your flathead screwdriver blade across the open end of the cover so that the blade will not scratch the metal. Use your ball peen hammer to gently tap the cover down into place. Keep applying pressure until you hear the cover click into place.
Finished
When the cover has been completely closed, you can set your tools aside and continue wearing your watch again now that clasp has been replaced. For other handy watch band repairs, or to learn how to change a different type of watch band clasp, check our Learning Center today.

Leave A Comment