
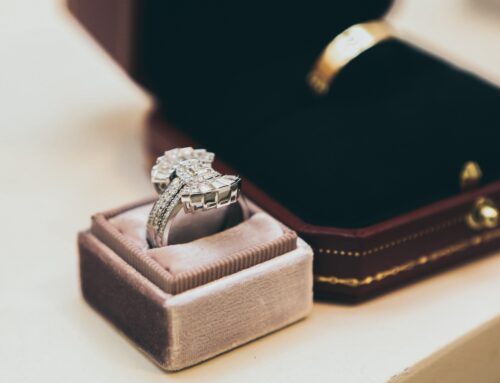
After years of wear, a ring’s setting can become weak and will need to be replaced to protect the stone. In this case, we will focus on a solitaire ring and the work necessary to replace the solitaire’s setting.
Step 1
Before you can replace the setting, you must first remove the stone from the current setting. Depending on how worn the setting is, you may be able to pry the prongs open with just a fine knife blade. If not, you can also use the tip of a flat graver, prong pulling pliers, or a combination of these tools. Only pull back enough prongs to allow for the stone to be released from the setting. Place the stone in a safe place and then clean the ring in preparation for the rest of the repair.
Step 2
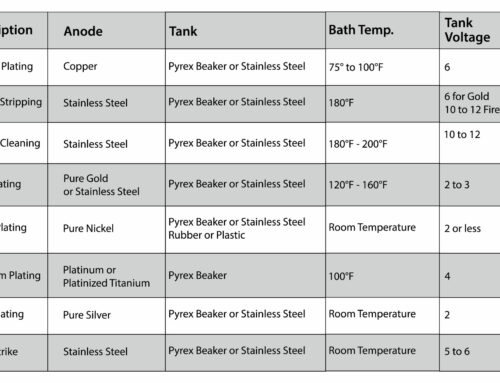
Now you need to remove the old setting. You can accomplish this by unsoldering it. Hold the ring in a third hand, fire coat the ring and set it on your bench with the setting up. Flux both seams where the setting meets the shank, and use a neutral flame to warm the ring. Grab the setting with a pair of tweezers when you get close to reaching the solder’s melting point. Keep heat on the ring until the solder flows. Once the solder is flowing, lift the setting out of the ring with your tweezers and quench the shank.
Step 3
Pickle and clean the shank, and recycle the old setting. Now you need to get a new setting for the ring. Find a setting that matches the cut of the stone and the previous setting, unless otherwise directed by the owner of the ring. The metal of the new setting should be the same as the shank. Check the new setting for size by placing the stone on top of the setting. Once you find one that matches the stone and the ring, you are ready to continue the repair.
Step 4
You may have to modify the opening in the shank to fit the new setting. You can accomplish this by filing the ends of the shank to match the contour of the setting, and by adjusting the size of the gap in the shank. As you work, continually check the fit of the setting in the shank: it’s always easier to remove material than to add more, so don’t over file. When the setting fits the shank correctly, the bottom of the setting should protrude slightly into the finger hole of the ring.
Step 5
While there are several ways to hold the setting and shank together to allow you to attach them, the best tool for this is a head-and-shank tweezers. Rest the setting against the flat side of the tweezers and line the shank up with the curve of the shank end of the tweezers. The tweezers will hold the setting and shank together while you examine the alignment of the setting and shank. Once you are satisfied with the positioning of the setting, fire coat the ring. Then flux the seams and add a small square of solder to each side of the setting on the inside of the shank, with the thin edge touching the setting.
Step 6
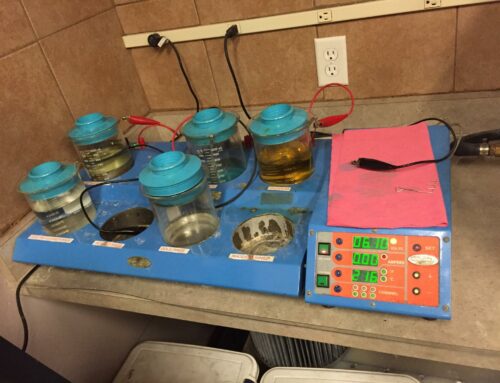
Slowly heat the ring and as you near the solder’s melting point, focus the heat on the seams. Once the solder flows, the heat will draw the solder through the seams, creating a secure bond. When the solder has flowed completely through the seam, remove the heat and quench the ring. Pickle and rinse the ring before continuing.
Step 7
With a half-round ring file, remove the bit of the setting that rests inside the shank. File the setting down until it is flush with the interior of the shank. Do not over file the setting as that will thin the shank. If it’s necessary, you should size the ring now before continuing with Step 8.
Step 8
Use abrasive paper to remove the file marks on the interior of the shank. Start with a coarse grit and work your way to the finer grit papers. The finer you sand, the less polishing you will have to do next.
Step 9
Use a ball bur, or setting bur, to remove the sharp corner that has formed on the inside of the setting. Twist the bur by hand to countersink the opening. Polish all the surfaces of the ring completely with your polishing compound of choice. Don’t forget to polish the interior of the setting also.
Step 10
You may have to adjust the setting slightly to accept the stone. To do this you can use a regular pair of chain nose pliers and adjust the prongs one-by-one until their angles yield the right size opening for the stone to sit where you want it to. Keep all the angles equal and symmetrical.
Step 11
With sticky wax, pick up the stone and set it in the setting to check your work. The stone should make equal contact with all the prongs. If the stone is too low, you can raise it by bringing the prongs closer together again. If it is too high in the setting, you can lower it by pulling the prongs farther apart. Keep in mind that after you set the stone, it will rest about .5 mm lower than it does now.
Step 12
File the tops of the prongs until they are all level and even. Be sure to leave them long enough to give you extra leverage when pushing them over the stone. Now you need to choose a setting bur that is the same size or slightly smaller than the stone. Lubricate the bur and using a low speed begin to cut the seats in the prongs. Don’t let the bur twist the prongs or grind away too much metal. Check the fit frequently with the stone. For a correct fit the tips of the prong should be about three-quarters of the way above the girdle of the stone, almost to the height of the table. You can set the stone more deeply if you want, but it should be at least at this height.
Step 13
Cutting the seats will leave a rough bur on each prong. Use a fine needle file to remove these burs and ensure that there are no rough corners that may damage the stone. You can now insert the stone into the setting. Be sure that the stone sits level in the setting. Holding the ring in a ring clamp will hold it steady and secure and allow you to work on the prongs. With a prong pusher, close the prongs methodically. First partially close one prong and then move to the prong opposite and partially close it. Always work in pairs of opposites, but do not push the prongs all the way down against the stone.
Step 14
Once all the prongs are mostly closed, check your work. Now complete the process of pushing the prongs down. Continue to work in pairs of opposites and push the prongs so that the entire prong makes contact with the stone’s crown facets. Hold the ring up to the light: no light should be visible between the stone and the prong.
Step 15
If the prongs are too long, and cover too much of the stone trim them with a file. Be sure that the prongs are smooth and round so they don’t catch on anything. Use a cup bur to systematically round each of the prongs. The prongs should all be exactly the same, cover as little of the stone as possible, and be heavy enough to withstand wear where they do cover the stone.
Step 16
Polish the prongs, and clean the ring one last time. The stone should be level and secure in its new setting. You can visit Esslinger.com’s Learning Center for more useful jewelry repair guides.
Leave A Comment