
Do you have a coin set in a coin bezel as a pendant, key chain, or other keepsake? Does the coin seem pretty loose make you worry about it falling out and getting lost? Then check out this handy guide to learn how to easily tighten your coin bezel setting with an entire watch gasket.
You should use an entire watch gasket to tighten your coin bezel when your coin is consistently too small for the bezel all around the edges. Using this gasket method allows you to make an overall, even change in the size of your coin without permanently attaching the coin to the bezel if you decide to move or change it later.
Tools Needed
- A Flathead jeweler’s screwdriver
- A digital gauge
- A thin rubber watch gasket
- And a notepad and pen
Step 1
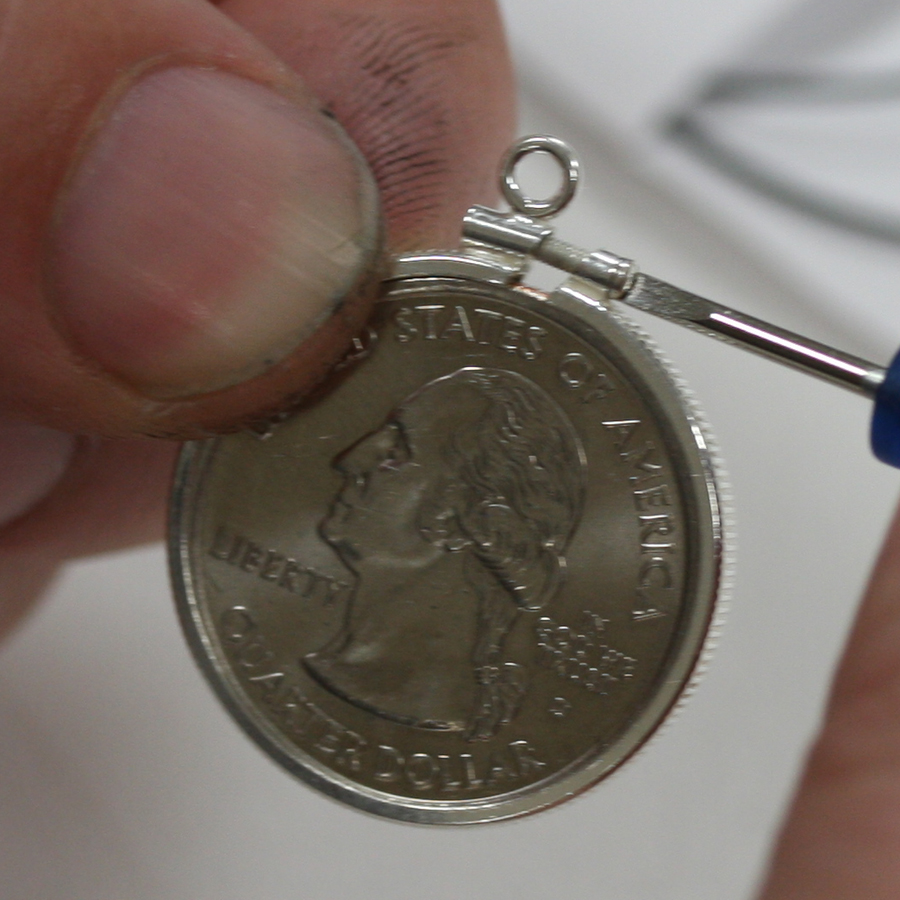
The first thing you must do is remove the coin from the coin bezel. Use your flathead screwdriver to open the coin bezel setting and remove the coin. Be sure to set the bezel and screw aside somewhere where they won’t get lost or knocked to the ground.
Step 2
Next, lay the coin out flat on your workspace before you. Then take your digital gauge and open the jaws wider than the coin itself, positioning the jaws on either side of the coin. Close the jaws until the hug the coin snuggly, directly in the middle of the coin. Repeat this measurement to ensure that you have an accurate result.
Record the diameter measurement on your notepad. This will help you order the gasket you will use to you’re your coin in place. Since the gasket should hug the coin snugly, you will want to subtract a tenth of a millimeter from the exact diameter of coin to ensure that it won’t slip off the coin or be too loose.
Step 3
With your adjusted diameter measurements, order a watch gasket to fit your coin.
If there isn’t a gasket that exactly matches your diameter measurement, get the next closest size on the smaller end because gaskets stretch a little and it is easier to work with a gasket that is a little too small than it is to fit a too big gasket to the coin. And, since the gaskets come in several different thicknesses, start by ordering the thinnest type of watch gasket for your bezel.
Step 4
Once you have the gasket in hand, you can attach it to the coin. Take the gasket and slip one edge around the outside of the coin. Hold it in place with your thumb. Then, use the index finger and thumb of your other hand to stretch the gasket slightly to allow it to slip around the rest of the coin and rest on the edge. Since the coin is fairly thin, it may take several tries before you get the gasket securely positioned on the coin.
Step 5
When the gasket is in place, gently pull apart the opening of the coin bezel so you can reinsert the coin. Be sure to place the coin carefully inside the bezel to keep from accidentally slipping the gasket off of the coin. It may take several tries to fit the coin into the bezel with the gasket on it.
Step 6
After the coin is in place, pinch the bezel together at the top and check the fit. If the coin is still too loose, remove it from the bezel again and slip the first gasket off so you can try a gasket with the next greatest thickness on for size.
Slip the second gasket on to the coin, repeat Step 4 to replace the gasket and check the fit of the coin in the coin bezel again. Repeat this process until the coin fits perfectly in the bezel.
Step 7
Once you are satisfied with the way the coin fits in place, you can close the bezel again. Pinch the ends together at the top of the bezel and insert the screw. Using your flathead screwdriver, tighten it into place. Do not over tighten the screw as it can strip the metal threads and prevent your coin bezel from staying closed.
Finished!
When the coin is securely back in the bezel, you can continue to enjoy your unique coin bezel jewelry. Visit Esslinger.com’s Learning Center for more useful guides.
Leave A Comment