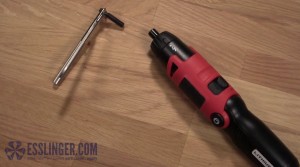
 Whether you are a professional jeweler or an emergency worker, you may need to cut a ring off of someone’s finger on occasion. Stop wasting time and energy with traditional ring cutters, try using Esslinger-dot-com’s new electric powered ring cutter instead.
Click here for other methods of emergency ring removal
However, before you try using this cutter in an emergency, you’ll want to have a handle on how it works first.
Tools Needed:
- Esslinger’s electric ring cutter kit
- An inside polishing buff
- An old ring you don’t mind cutting
- A parts tray
- A paper towel
- And a pair of helping hands
Step 1
The first thing you will need to do, is attach your traditional ring cutter to the electric rotary drill base to make it an electric ring cutter. To do this, you will need to disassemble your traditional ring cutter.
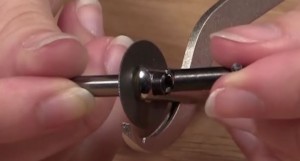 Start by gripping the silver ring cutter key in one hand to hold the cutting blade steady while you work. Then, take the included “T” wrench and insert the notched end into the black nut opposite the silver ring cutter key. Holding the key steady in one hand, turn the T wrench counter-clockwise to loosen it. Keep turning the wrench until the black nut falls free. Be sure to put the black nut in your parts tray because you will need it later to hold the drill attachment securely to the ring cutter.
Step 2
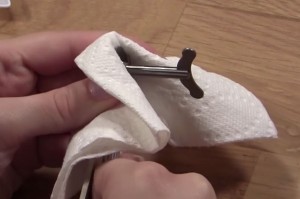 The silver ring cutter key will still be attached to the blade, so you will have to remove that next. Take your paper towel and carefully grip the ring cutter blade to keep it from turning. Then turn the ring cutter key counter-clockwise to unscrew it from the blade. Once you have loosened the ring cutter key, you can remove it and set it aside in your parts tray.
When the blade is completely free, you’ll want to be sure to keep the blade as much in place in the cutter as possible so you don’t loose or damage it. Hold the blade in place and close the cutter’s jaws so it will hold the blade on its own. Set the cutter aside.
Step 3
Next take the black screw end drill bit for the rotary drill and insert it into the ring cutter. You can put the drill bit on either side of the ring cutter to make it a left handed, or right handed tool depending on your personal preferences. Holding the blade steady with your paper towel, and turn the drill bit clockwise to tighten it into place to replace the ring cutter key.
When the drill bit is securely screwed into place, take your black nut, and place it over the protruding screw end of the drill bit. Carefully turn the nut clockwise to tighten it into place with your fingers. Be careful not to drop the nut because without it you won’t be able to use the ring cutter at all. Once you can’t turn the nut anymore with your fingers, take the T wrench again and use it to finish tightening the nut into place.
Step 4
Before trying to use the rotary drill be sure to check the following two things:
- First, check the setting indicator at the front end of the drill, there should be two options indicated by the lightning bolt and a person holding the drill handle. The drill is on and set work as an electric drill when it is in the lightning bolt position. Whenever you are not using the drill, be sure to turn it to the hand position, or manual option, to save battery and prevent accidents.
- Secondly, you should check the power control button. Turned all the way to the left, the drill will run in reverse. In the middle position, the drill is off and will not operate. And turned all the way to the right, the drill will run forward, this is the setting you should always use when removing rings.
Step 5
After the drill bit is securely attached to the ring cutter and you are certain the drill is off, you can insert it into the drill bit the electric rotary drill. Simply insert the hexagon shaped drill bit into the mouth of the drill and push into place. The lower half of the rotary drill is highly adjustable to provide you with comfortable grip on the tool. Simply push the padlock button into the handle and adjust it to your hand.
Step 6
Make sure that the rotary drill is in the forward position and set to power mode. Holding the drill, practice running it without a ring under the blade. Press down on the power switch and feel how the blade works when attached to the drill. Practice gripping the ring cutter body in your non-dominant hand keeping two fingers in between the handles like the picture. By doing this, you will be able to open the cutter quickly, pulling the blade away to stop cutting if something goes wrong.
Once everything is put together, and you have a feel for how the tool sits in your hand, you are ready to practice cutting off a ring.
Step 7
Take the inside polishing buff and place your ring on it as if it were a finger. Have your friend hold the polishing buff finger with the ring toward you, so that you can concentrate on cutting the ring off. Be sure to turn the ring around on the polishing buff so that the back of the ring faces up toward you.
Step 8
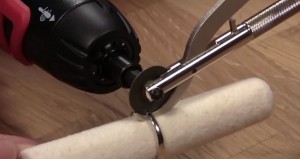
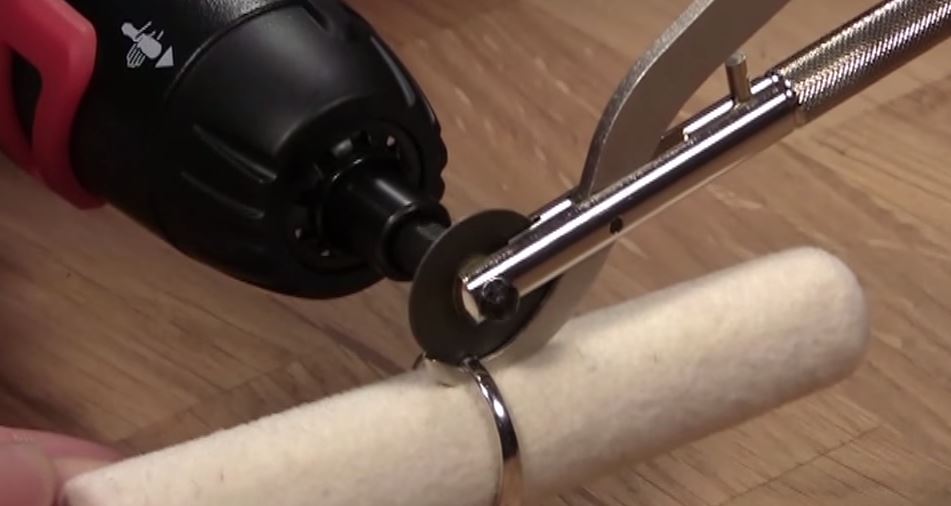
Take your ring cutter and slide the protective shield of the ring cutter under the back side of ring between the finger and the metal. Be sure to hook the edge of the ring band in the divot on the shield. This will keep the ring from slipping and injuring the customer while you cut the ring off.
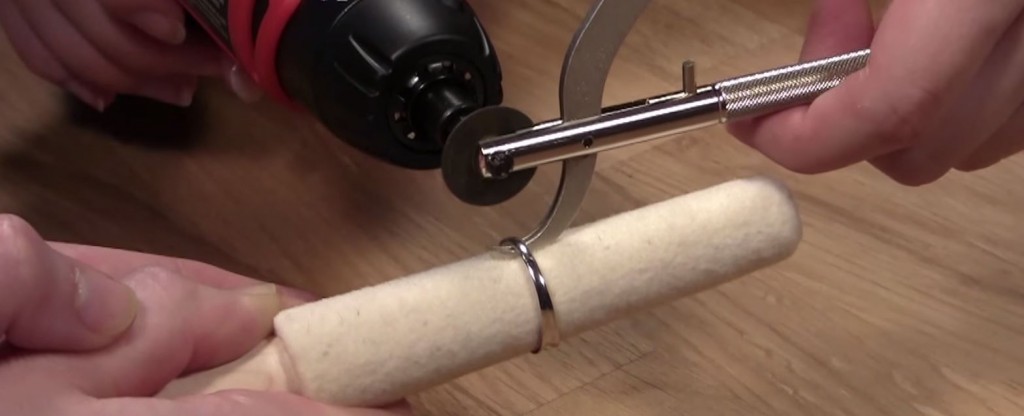
Keep the blade raised away from the ring and start it spinning.
 Step 9
Once you have as steady grip on the cutter and blade, slowly lower it down onto the metal of the ring. As the blade reaches the metal, you will feel a change in how the blade is turning as it starts to cut through the metal. Steadily increase pressure on the ring band with the blade to cut through the ring.
Since the electric ring cutter works much faster than a traditional ring cutter, the tool may get warm quickly. Stop at any time if your customer expresses discomfort.
Caution: using too much pressure to cut the ring can cause the threads of the adapter piece to become stripped and the electric ring cutter will no long work correctly. You only need a light touch to cut through the gold or silver ring in a matter of seconds. You can order additional arbor adapters for the power ring cutter if you have accidentally stripped it or lost it.
 Step 10
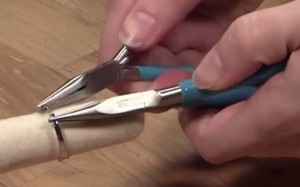
When you have successfully cut through the ring, you will feel the lack of resistance between the ring and your ring cutter blade. Lift the blade up and slide the ring cutter shield out from under the band. Turn off the ring cutter to keep it from accidentally restarting, and check your work.
In this case, you can just slide the ring off the inside polishing buff and check that you cut completely through the band. However, if it really was a ring caught on someone’s finger, you will have to use pliers to pry the ring open wide enough for them to slip the ring off after it has been cut.
Finished
And that is all it takes to use your electric ring cutter to remove a ring in minutes. To learn more about watch and jewelry repair, or about other cool products we carry, check out the rest of our Learning Center and our online catalog today.



Hello, I purchased an electric ring cutter last year but luckily have not had to use it. I recently was made aware that the blades I purchased have too large of a center diameter to screw onto the bit. Can you tell me the correct blade to purchase?
I’m not which ring cutter you bought, but this is the replacement blade we sell for our electric ring cutting kit: https://www.esslinger.com/replacement-hardened-steel-saw-blade-for-ring-cutter-pliers-48-180-48-183-48-195/
There is also a diamond coated blade option here: https://www.esslinger.com/diamond-coated-saw-cutting-blade-for-ring-cutting-pliers-48-180-48-195-and-48-183/
I purchased the ring cutter kit and the drill bit is to large to screw onto the blades. Can please help me with this issue. Thank you.
The arbor adaptor that allows you to use the ring cutter with the power tool is what screws into the blades. The blades might be a tight fit on the threaded adaptor, but they should all fit together. If you are still having issues, try using the contact us form and someone will be able to give you better direction with your issue. https://www.esslinger.com/contact-us/