
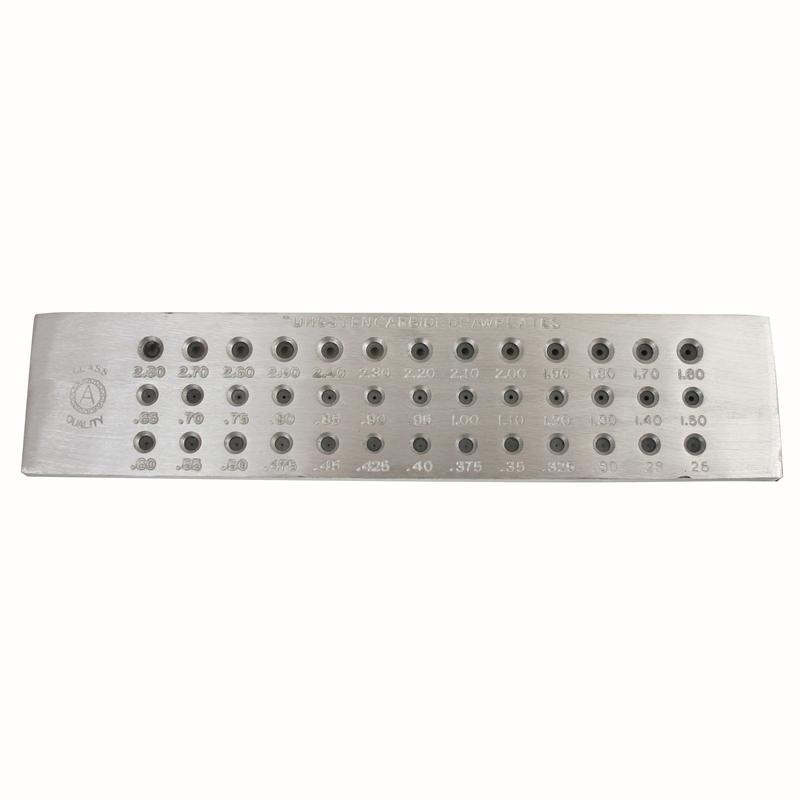
While it may be 100 times easier to buy wire than make it, sometimes you need wire in a pinch and can’t go out and buy it. When that happens, there’s nothing handier than having a draw plate on hand: with it, you can easily change the size of the wire you do have to the size you need. So, now that you know the benefits of having a drawplate around, how do you actually use it? This article will cover the most common use of a draw plate. However, once you add a tool like this to your work bench, you can greatly expand your wire jewelry making abilities. You can use the draw plate to straighten wire, shape the wire into half round shapes, and much more.
To change the wire gauge, you’ll need:
Step 1
Once you know which gauge wire you need to make, choose a wire of larger gauge that is closest in size to the gauge you need.
Step 2
Add drops of lubricant onto the holes of the draw plate that you’ll be using to size the wire. Be aware that the draw plate is marked in millimeter sizes, so don’t forget to convert your gauge sizes to millimeter sizes. Click here for wire gauge to millimeter conversions.
Step 3
Place the draw plate in a vise with a soft cloth wrapped around the plate where the vise will grip it. This will keep the vise from scratching the draw plate. Remember to make sure that the holes you’ll be using are NOT covered by the vise.
Step 4
Taper the end of your wire with a file. Hold the wire firmly in your hands and use your jeweler’s file to file the end of your wire to a taper. The taper will make it easier for you to pull the wire through the drawplate.
Step 5
Once one end of the wire has been tapered, lightly coat the entire length of the wire with lubricant.
Step 6
Choose the draw plate hole that is a size smaller than the wire’s current gauge size and feed the wire through the back side of the plate (where there are no numbers). It should fit in this hole snugly.
Step 7
Now, using gripping pliers, slowly pull the wire all the way through the plate. Keep your motions as smooth as possible to avoid bending your wire.
Step 8
Repeat steps 5 – 7 until the wire is the gauge size you need it to be.
Leave A Comment