
Replacing the hands of a watch can have a large visual impact on how the watch looks, impacting both the overall styling and not just the legibility. The process of changing the hands of a watch can quickly become complicated, as there are many potential sources for problems that can cause aesthetic damage or even stop the watch completely. Care must be taken to ensure that the hands can freely move around the dial as intended, as well as to prevent accidental damage to the hands when installing them.
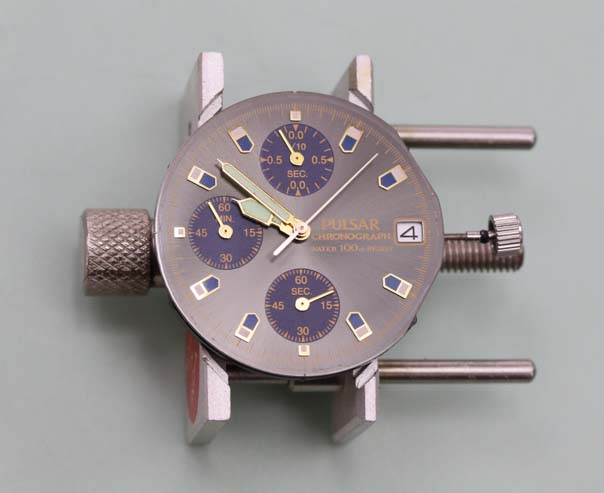
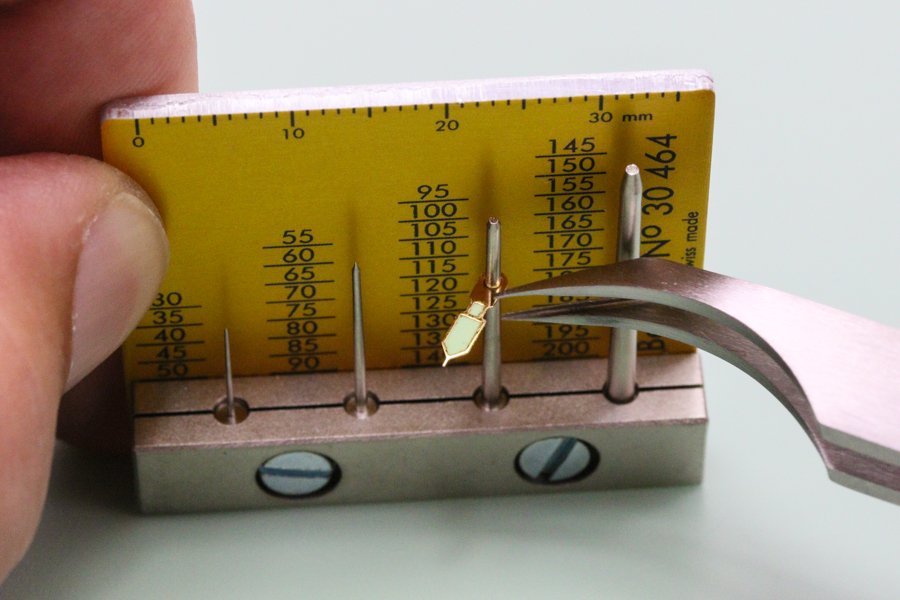
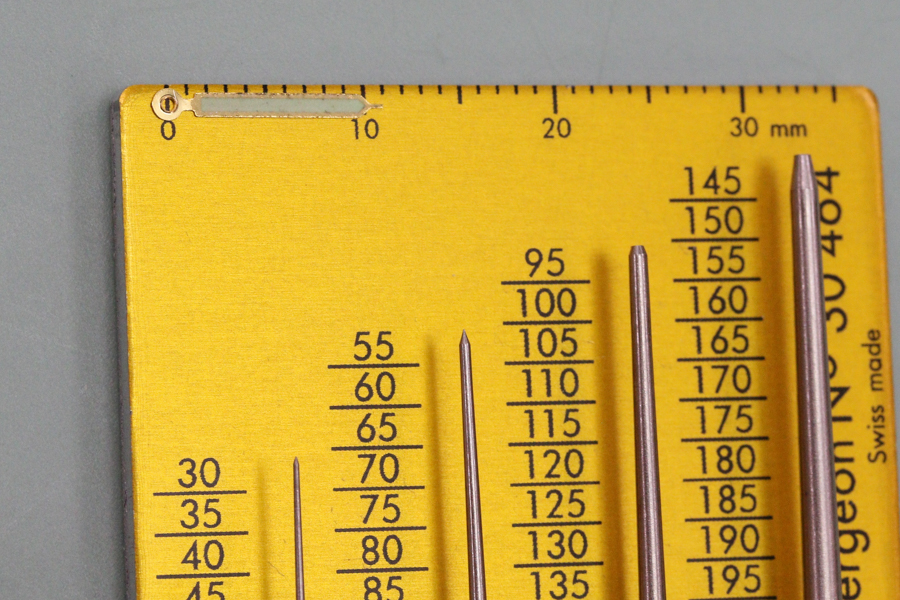
The foremost concern when changing hands is that the new set of hands will fit on the movement of the watch, as hands are not standardized to a small handful of sizes. The size of a hand is determined by two measurements; the diameter of the hole at the hub of the hand and the length of the hand. These measurements are done in millimeters- down to tenths of a millimeter for the diameter of the hole at the hub (or hundredths in the case of seconds hands) and typically whole or half millimeters for the length. The diameters of the center holes can be measured either with a special hand sizing gaugeor by using calipers to measure the posts sticking up from the movement. It should be noted that the length of the hand is measured from the tip or end of the hand to the center of the hole at the hub, not to the end opposite the tip. This means that the specified length of hand ordered will be shorter than the full physical dimensions of the hand.


The lengths of the hands chosen for a particular watch should be carefully decided. A good general rule of thumb is that the tip of the hour hand should just reach or touch the inner edges of the hour markers, the tip of the minute hand should reach either the outside of the hour markers or the inside of the minute markers, and the tip of the seconds hand should reach at least the same as the minute hand or to the outside of any seconds markers. These guidelines will help to make a watch easily legible at a glance and visually appealing.
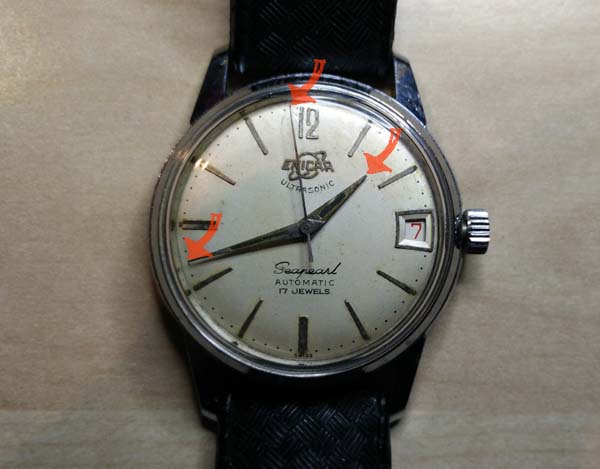
If, for instance, an hour and minute hand are chosen which are very similar in length it may be difficult to easily and clearly read the time at a glance or In low light conditions because you may not be able to tell the two apart without extra thought or concentration. If a minute hand is too short, you may not be able to accurately gauge the time as precisely as desired. For the same reason, a seconds hand should reach as far outward as possible to clearly differentiate the seconds as they elapse. Precautions should be taken if the dial of the watch has raised or applied index markers, as too long of a hand can touch or catch on the markers causing the watch to stop or scratch the markers as they pass by.
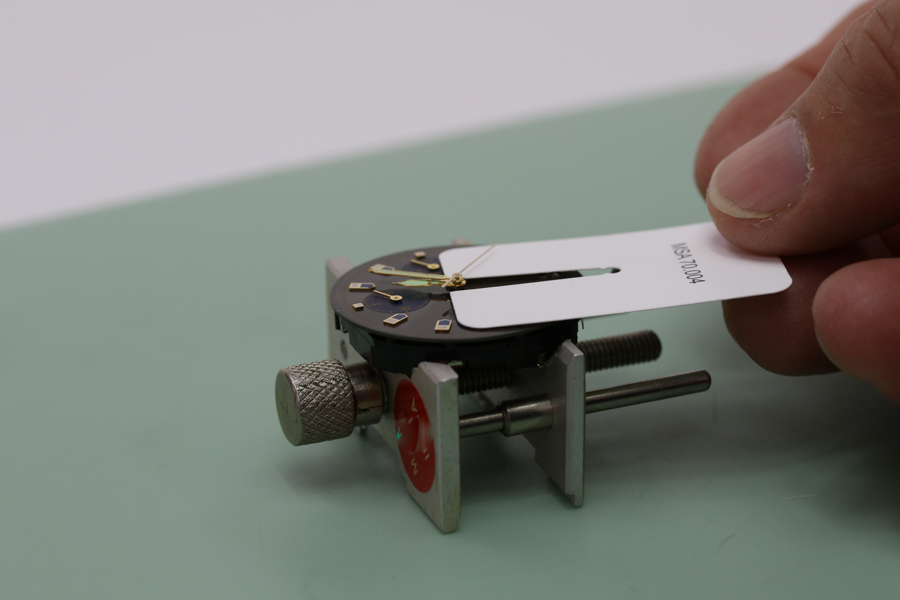
Before a new set of hands can be installed, you need to remove the old hands from the watch. There are several methods which can be used to remove the old hands, and while they all have their pros and cons, if done carefully and with the correct techniques all of them will work. The most common methods of removing hands are the Presto type tools and the more basic hand levers. Regardless of method used, it is good practice to protect the dial while removing them, either with the use of specific dial protector or a small section of plastic film.
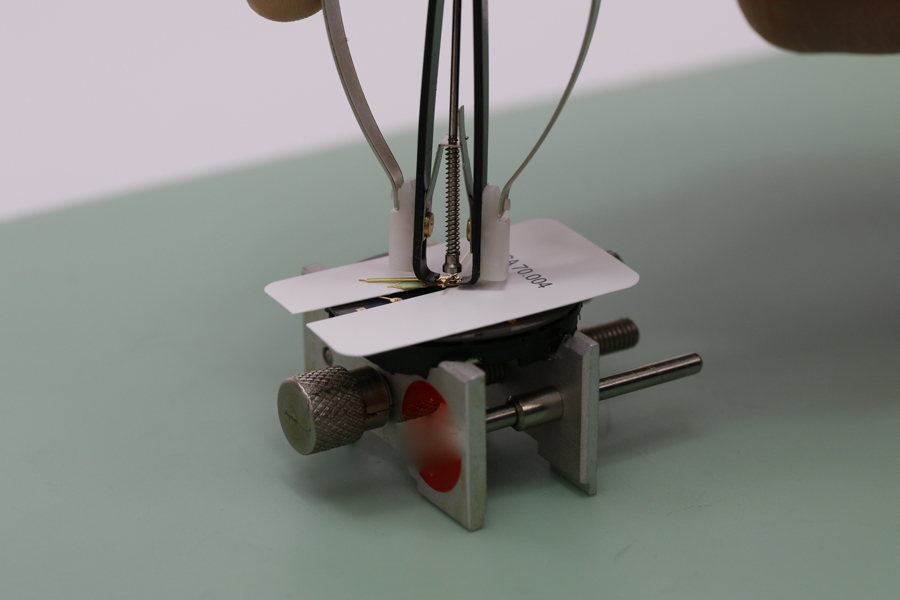
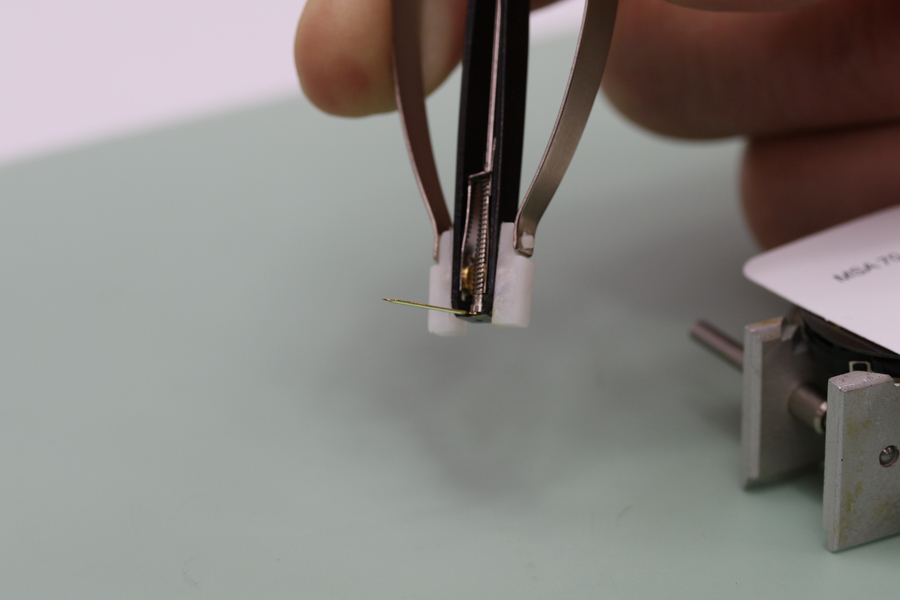
When using a Presto tool, one finger (usually the index finger) should be held on the top of the tool to steady it while in use, and the center guide placed atop the hands to be removed. Gently squeeze the bowed arms of the tool inward and guide the blades of the tool to the underside of the lowest hand while taking care to keep them from touching the dial. As you continue to squeeze, the tool will close under the hands and the white posts will lower onto the dial (the reason for using the dial protector) and gently lift the hands up and off of the movement. Hand levers are simpler in operation as the tips are placed under the hands and up to the center posts and then the opposite ends gently lowered down to lift up the hands.
When it comes time to install the new hands, the exact process and order can vary based on the complications of the movement, but the technique remains more or less the same. The tools used to install the hands come in a variety of types, but the most common are the hand held pressing tools and the bench top hand presses. You want to choose a tip that roughly matches the size of the hub on the hand to press with, while also making sure that it has a hole adequately sized to allow for any posts sticking up past the height of the hand you’re installing. A softer scratch free material for the tips is probably a good idea, but if the tip material is too soft it can make proper leveling of the hand more difficult. Some people find doing the entire pressing operation by hand is adequate, and some people prefer to only hold the pressing tool in place and then tap lightly on the back end with a pair of tweezers, in the same manner a nail is hammered in, to slowly press the hand down incrementally.
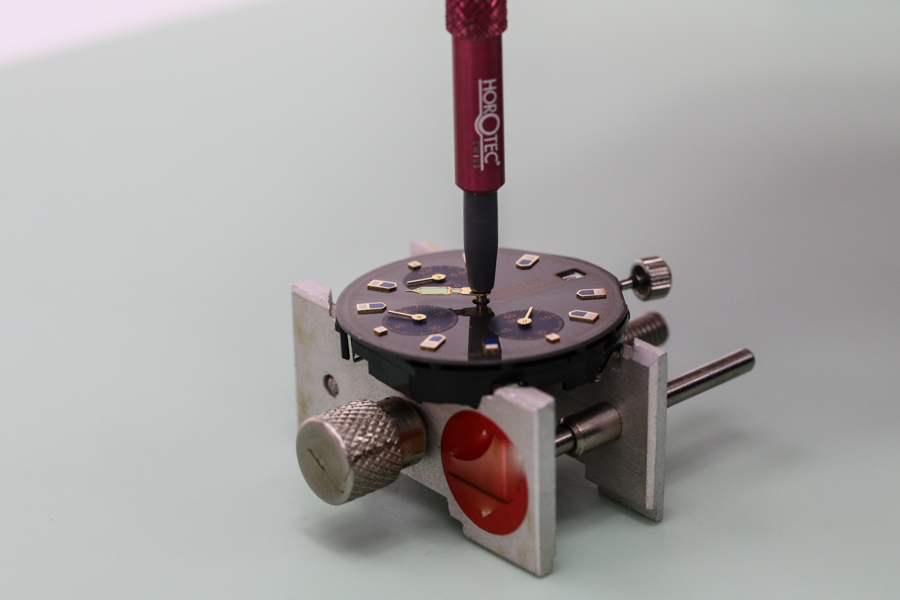

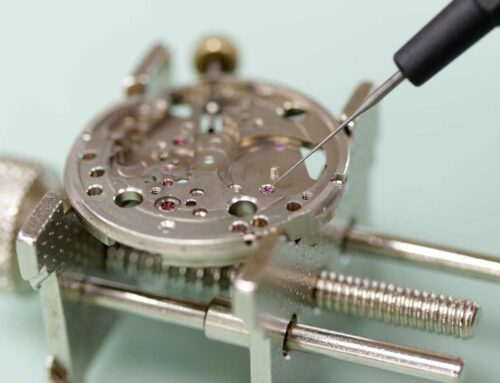
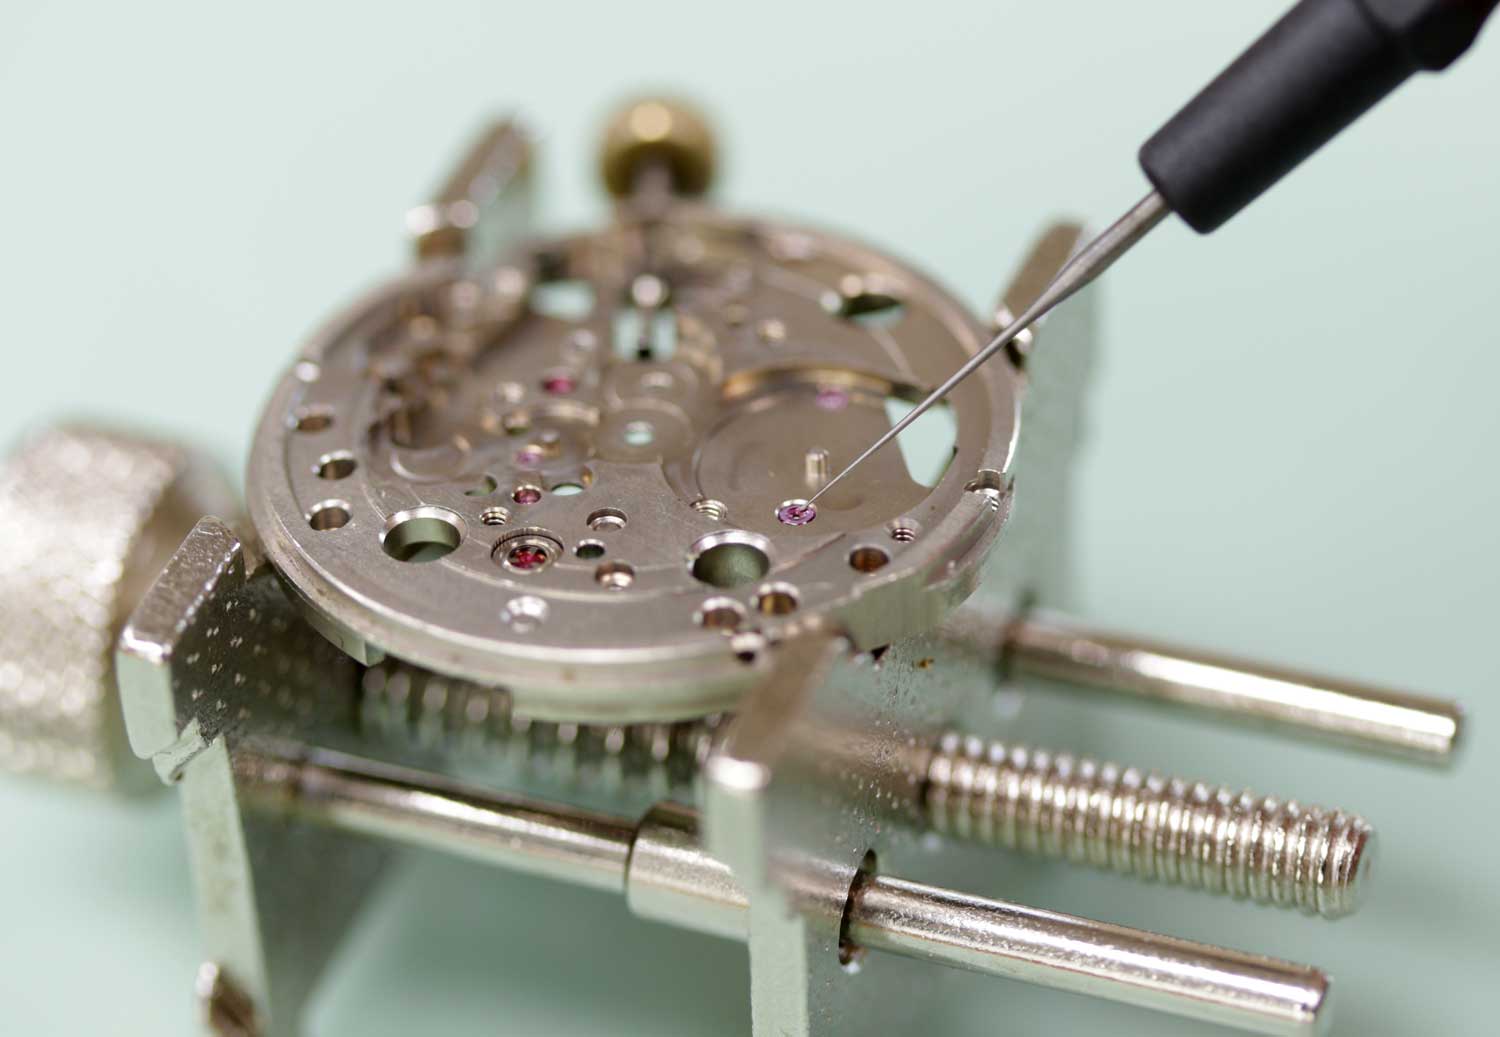
It’s also a wise idea to hold the movement in a movement holder designed for the specific movement, or one that at least has a support for the center jewel if you’re installing a seconds hand to prevent the jewel from getting pushed out of place during the installation which will cause the watch to run erratically or stop. When you’re pressing the hands onto the movement, the general height guideline is to press the hand down until the top sits flush with the post it mounts on. Care should be taken to make sure the hand runs level the whole length so that it doesn’t touch or catch on the dial or another hand. If the hand has a luminous paint it’s not unusual for it to stick out on the bottom side of the hand, be sure that there is clearance between that excess paint if it is not removed and the dial or other hands, as it will cause scratches if the paint touches as the hands rotate.


In some instances, primarily in watches with a curved or domed dial or crystal, the hands may need to be curved down at the tip for proper clearance. This curve can be formed in a variety of ways ranging from rolling a small round bar over the back of the hand while it sits on a soft surface to freehand with a pair of polished flat-tipped tweezers. Another potential issue to be aware of are hands which are too tall and touching the underside of the crystal, this will cause a slow loss of time or stopping of the watch and often results in a metallic circle being scratched onto the inside of the crystal. A simple gauge for determining maximum available height of the hands can be made by taking a plain wooden toothpick or sharpened stick of pegwood and placing the tip onto the inside surface of the crystal and holding it to and rotating it around the vertical flange surface inside the case. This will leave a clean and easily visible line set back from the tip of the toothpick which is the same height as the space between the dial and crystal when the watch is assembled. The toothpick can then be held to the dial of the watch and compared against the hands along their length to see whether the hand will touch the inside of the crystal.
If the movement has a date complication, traditionally the changeover of the date is desired to be at midnight. Before any of the hands are installed, pull the crown out and adjust the time forward slowly until the date changes, and then the hour hand installed directly to 12. The minute hand can then either be installed directly following, or the time can be further dialed forward until the hour hand directly aligns on another hour (often 3, 6, or 9 for ease of identifying alignment by eye) which can be useful if the hour hand has a tendency to jump slightly when the date changes over. In either case, it’s a good idea to dial the time around after both the minute and hour hands are installed and check alignment at the top of each hour and make sure that the hands are correctly centered over the hour indexes.
The seconds hand may or may not require more care. If the watch is mechanical they can generally be installed without any particular alignment, as they need not be synchronized with the hour and minute hands because those can be adjusted independently of the seconds hand to set the time. If the watch is quartz, it is generally desired that the seconds hand is aligned with the individual seconds marks on the dial with each tick of the watch. This can be tricky to get right, so it may be best to start with the seconds hand just barely pressed into place, and them observing how it’s aligned when running. Adjustments in either direction can be made by lightly rotating and tapping on the end of the hand press at the same time, serving to both adjust the position of the hand and seat it further at the same time. When the alignment is good, the seconds hand can easily be driven further straight down if needed. It may be necessary to remove the hand and start the process again if alignment can’t be easily achieved. If the hand is only very slightly out of alignment it can often be tweaked slightly by using a pair of hand tweezers to grip and slightly bend the hand in the direction needed near the center of the hand, this will usually be imperceptible to the naked eye if done sparingly.
Once all the hands are set, it’s a good idea to manually adjust the hands around a few times while checking spacing between the hands each time they cross over each other to make sure they don’t touch. If all these precautions are taken the movement can be placed in the case without worry of the hands catching or touching the crystal and causing hard to diagnose or intermittent timing issues that will require uncasing and further troubleshooting.
I just found this website this is amazing I want all my Christmas presents to come from here and I was almost late from work yesterday by going through this whole website LOVE IT !!!
A wonderful and very informative site with great tutorials
I love this site!
My aunt is visually impaired and has a special watch with an elastic/stretch style wristband that needed to be adjusted.
I referred to this website and the Esslinger YouTube channel for step by step instructions and the adjustment worked out great.
I think I caught the watch repair/customization bug!
Happy New Year!!!
Thanks for your support. Second time I got it right. Just had to learn a little finesse.
It would be nice to have more detail on the tricks to installing the sweep hand. This is what I am struggling with most, right now anyway.
Hi, fantastic site – very informative. A question – I’m thinking of designing my own hand set , but wondered if my hands were heavier than the originals would this affect the movement? Are there weight ‘tolerances’ between which any hands can be used, or is it a case of adjusting the movement to compensate for the extra ‘load’ ?
Many thanks,
Steve
I have a chronograph and the small hands are pressed down too far to even get a protector underneath. What tool do you recommend when there is extremely limited space under the hands?
You can try this tool: https://www.esslinger.com/horotec-watch-hand-removing-tool/
Or you can try watch hand removers like this one: https://www.esslinger.com/bergeon-30018-watch-hand-levers-pair/
It has probably the smallest thickness on it (at 0.15mm thick) to get between the dial and the hands.
Which brand or style of movement holder is recommended for amateurs with an interest in late 19th c. American pocket watches?
A popular movement holder for larger watches that feature nylon pegs to prevent scratching is this one. Or you can use a pocket watch movement holder. It really is down to personal preference, what price point you want and any other features like size, material, etc. Shop for movement holders here: https://www.esslinger.com/movement-and-case-holders/
Is there a risk of over-oiling a watch, and what signs should you look for to avoid damaging the movement? Additionally, how do different oil types impact the long-term performance of various watch mechanisms?