Cleaning Your Buffing Wheel
The best way to clean your buffing wheel is to use a wheel rake with its jagged blade. Start the blade running and then offer the blade side of your wheel rake to the buffing wheel. Gently work the wheel rake back and forth across the face of the buffing wheel until it looks bright and fluffy again. If done frequently, this process will remove metal particles that may have become trapped in the wheel to keep from scratching more delicate parts the next time you start to polish.
For a more thorough cleaning, you can use a hot water solution with a few drops of ammonia to cut through the compound residue and clean it out. If you put it in an ultrasonic cleaner, you can make the process go more quickly and let the ultrasonic waves shake the loosened grit and debris from the buffing wheel. However, you will have to let the wheel dry completely before using again, so you may not be able to use it for an extended period of time.
Eliminating Swirl Marks
These so-called swirl marks for their appearance on metals after they have been polished and buffed in the final stages, are easy to remove. You will simply need to wet the affected area with a damp cloth and then dust the surface with a cleaning powder like Whiting, Talcum Powder or even Corn Starch. Once you’ve done that, you will just need to buff the piece on your wheel again until the swirls disappear from view.
Little and Often, Applying Compound
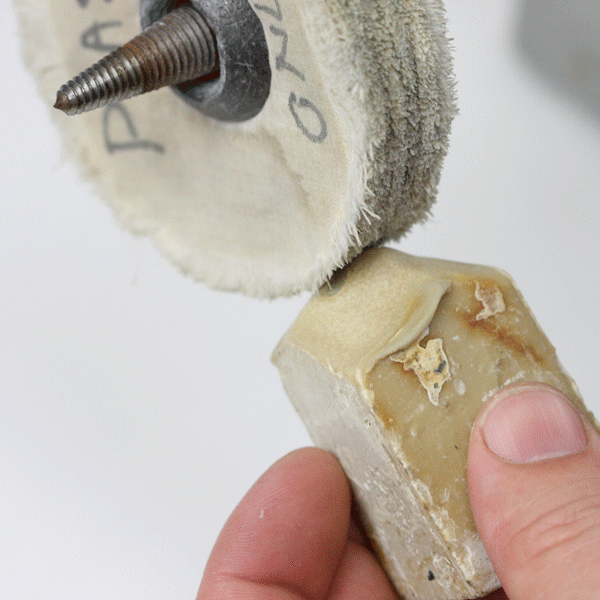
How do you know how much compound you need to apply to your buffing or polishing wheel? There’s no set in stone amount, but the secret is to use small amounts of compound frequently. Do this by applying your compound to the wheel for roughly a second or two, and then polishing, repeating the process often.
The best way to apply your compound is to add compound t to the wheel before you attempt to polish anything. When you apply the compound first and then start to polish later, the piece that you need to polish will actually help you work the compound deeper into the buffing wheel while it is polishing which will give you far better and faster results while conserving your compound.
If you use more compound at a time, you will actually decrease the efficiency of the compound. If the wheel becomes too greasy or over lubricated, the cutting action will be impaired and making your attempts to polish ineffective. You can tell if there is too much compound on wheel if you notice that a black slick of compounds begin to appear around the piece, generally at the edges of the areas you are polishing. You can remove excess compound by using the wheel rake mention previously.
One Wheel. One Compound.
Avoid layering or mixing different compounds as much as possible, because by mixing them you can end up with an odd mixture of abrasive surfaces which will defeat any benefits you hope to achieve by using a finer or coarser compound. Additionally, the metal deposits that are left behind in the wheel from previous polishing will vary in size depending on the coarseness of the compound used and can damage pieces that need a finer polishing compound.
If you do have to apply a compound to a previously used wheel, there are a couple of things you can do: first you can clean the wheel as discussed above, or you can apply multiple compounds wisely if you do not have the time for a complete wheel cleaning. Only apply a compound that is coarser than the last one used on the wheel if you are doubling up on compounds on a used wheel. Never use a final polishing or coloring compound on a wheel or buff that has been used for coarse cutting or buffing, this can damage the piece you intended to finish with rough particles that remain in the fibers of the wheel.
Another good alternative to avoid this problem all together is to start off using a one-step polishing compound, like Fabulustre, which allows you to do a wide range of polishing and buffing on a wide range of metals with just one compound. This removes all the potential hazards of changing compound grits and keeping track of which buffing wheel is used for each compound.


It makes sense that you would need to work on the metal piece a little more to be rid of swirl marks and things like that. Having a good compact grinder to help you get rid of them could be a good idea. That way you can save some space and use it for other things.
Thanks for the info on compounds ……the project Im working on is my Harley 06 Haritage…..a bit larger than a watch or ring .
But for the most part same principle s apply .use the right tool for the job.!
Hard Chrome and lots of Aluminum ….large pieces…….that can be buffed and polished to a mirrior finish .to resemble the chrome fishtail pipes and other chromed parts of the bike…….however for me its been awhile since these old guy hands have put rag polish and buffing wheel to any metal that needs to be eyepopping polished.so ……..it seems the art of buffing polishing and finishing to a bright luster finish …..is a parishable skill if not practiced . many of the trade crafts I once used and practiced wirh…….usually on aluminum truck fual tanks ……seemed to allude my memory today……like useing talkem powder to remove swerils……seems no matter the controlled touch or correct speed of the buffer swerles are a part of this game some how.
I also recall useing lighter fluid for a lubricating agent it seems .but for the life of me Im at a loose weather it was used on chrome plastic lenses or aluminum.but one agent that laughingly will always stick in my mind was……….Wait for it………..
KY JELLY…………
TRY going up to a Truck Stop counter on a 100 degree day filthy from polishing tanks and rimms all morning in Bakersfeild Ca ….
And asking the counter person if she stocks
…………KY JELLY…….AT A TRUCK STOP……!&#!$%÷€£€
the look she lears back at you with alone could run you off……that is ,until ya tell her what ya are useing it for……..polishing and buffing. Then …….all hell bracks out In laughter ………as red faces begain to crack wide with big grins and looks of “oh ….I knew all along what he wanted it for”, sure they did—–?!…….but for real yes a little dab of ky goes along way to keepin polish plyable and workable .just bring your own and keep it barried in your tool bucket……….
This concept is very good which give us information regarding the tips and tricks for buffing and polishing. It is a pleasure worth reading this article. I enjoyed reading this article and would suggest others to come In this particular blog and get all the information regarding it.
I polish my gold wedding ring with red rogue and a Dremel nylon brush. Occasionally the red rogue turns the gold hazy and dark. I have to keep working the rind and eventually I am able to get the shine back. I have tried replacing the red rogue and the brush with the same blackened haziness on the ring. Any ideas of what I can do? Bill
I would definitely swap out the nylon brush for a cotton or felt wheel, dremel is known for them
I would like information on preparing the muslin wheels to keep the threads from flying everywhere somewhere I read once about just burning the edges with a lighter do you have any advice on preparing a muslin wheel so you don’t end up with a mess?
You shouldn’t need to do any of that. The muslin buff is ready as-is. Just apply your compound and you are ready to buff/polish. Threads and fibers shouldn’t come off en masse, or much at all, while you are polishing on your buffing machine.
Thank you for warning us that the metal deposits left behind in the wheel from the previous polishing can end up damaging the pieces that need a finer polishing compound, which is why it’s recommended to avoid mixing different compounds as much as possible. I imagine if the products your company is selling require polishing to be done, it would be wise to heed this advice if you want the best results. I’ll be sure to bear this in mind in case I ever need industrial polishing equipment next time.