
Precut settings are the perfect way to make beautiful gemstone jewelry without needing a lot of experience or technical knowledge. With this guide you will learn exactly how to set a stone in a precut setting with a pair of gem setting pliers.
Tools Needed:
- A pair of gem setting pliers
Step 1
Before starting to set a gemstone in a precut setting, you need to make sure you have a gemstone that is compatible with the settings: Use only machine cut or diamond cut gemstones and diamonds in precut settings to avoid the issues created by a stone that is cut out of proportion.
The first thing you must do when using a precut setting is ensure that the setting is the same millimeter size as the gemstone. Measure the diameter of the stone you want to set, and be sure to order setting that is the same size – Do NOT use the carat size as your only reference.
Step 2
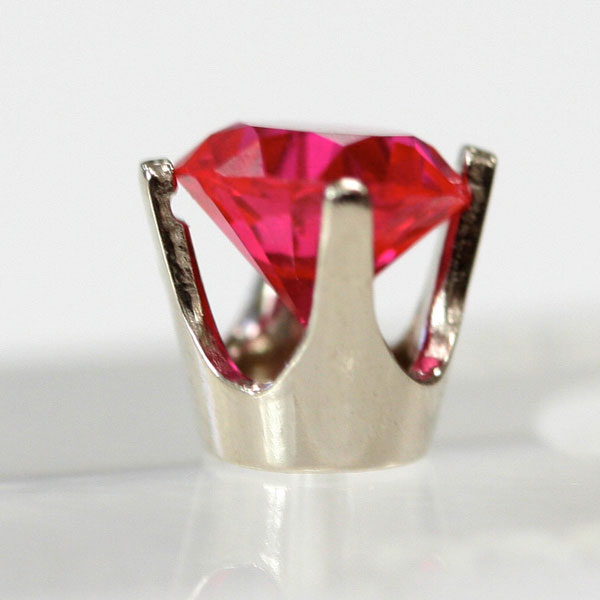
Once you have determined that the precut setting is the right size, you are ready to set the stone. Place the gemstone table side down on a flat a sturdy surface.
Step 3
Next, take the precut setting and position the setting so it is directly above the stone. Then, firmly press down until the stone clicks into place in the setting. Be sure to hold the setting vertically throughout this step to ensure that the stone is set evenly.
Step 4

Once the stone is in place, you need to check and make sure it is evenly positioned in the prongs. Hold the setting up and look at it from the side. The stone should be set flat in the precut portion of the prongs, not at an angle.
Step 5
When you are satisfied that the stone is set straight and exactly where you want it, you are ready for the next step: securing the setting. This is where you will need your gem setting pliers that were designed to grasp the prongs of your setting.
Hold the pliers in your dominant hand and the setting in your other hand.
Step 6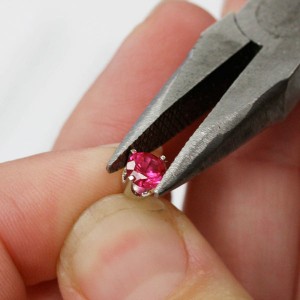
Grip two prongs set diagonally, in a four prong setting, or across from each other in a six prong setting with the pliers and apply a small amount of forward and downward pressure to each of these two prongs, one at a time.’
Be sure not to apply too much pressure as it could damage the setting or the stone, instead repeat the bending process one each prong individually if necessary.
Step 7
Repeat this process for each of the other prongs, always working on the prongs that are opposite each other before moving on.
Finished
When the tip of each prong has been tightened, you are good to go. An optional finishing step would be to polish or shape the prong tips, but this requires additional tools and instructions. Check out our Learning Center for more helpful how to articles.
Leave A Comment