 If your metal watch band is too big, you can easily remove links to make it smaller and ensure a perfect fit. Use this guide to remove links that are held in place with spring bars. How can you tell if your watch band is held together with spring bars? Look at the inside of the watch band. If there are no holes on the outside of the links, but the back of the link has an arrow and a small window in it, you are probably dealing with a watch band held together with spring bars.
 Tools Needed:
- A bench mat or other protected surface
- A spring bar tool
- A non-magnetic tweezers
- And a parts tray
Step 1
When you need to adjust the length of your metal watch band by removing links, it helps to know exactly how many links you need to remove. To learn How to Determine How Many Links to Remove from your watch band, check out this article.
Once you know how many links you need to remove, you need to decide how many links you are removing from each side of the band. Remember that anytime you are removing more than one link, you should split the total to be removed between both sides of the clasp so you can keep it centered on your wrist.
Step 2
Once you know which side of the band you want to start removing links from, set the watch on its side on the bench mat. The arrows on the links should be pointing down toward the mat.
If you don’t feel like you have enough room to access the links with your spring bar tool, you can open the watch band clasp to give you more room to work.
 Step 3
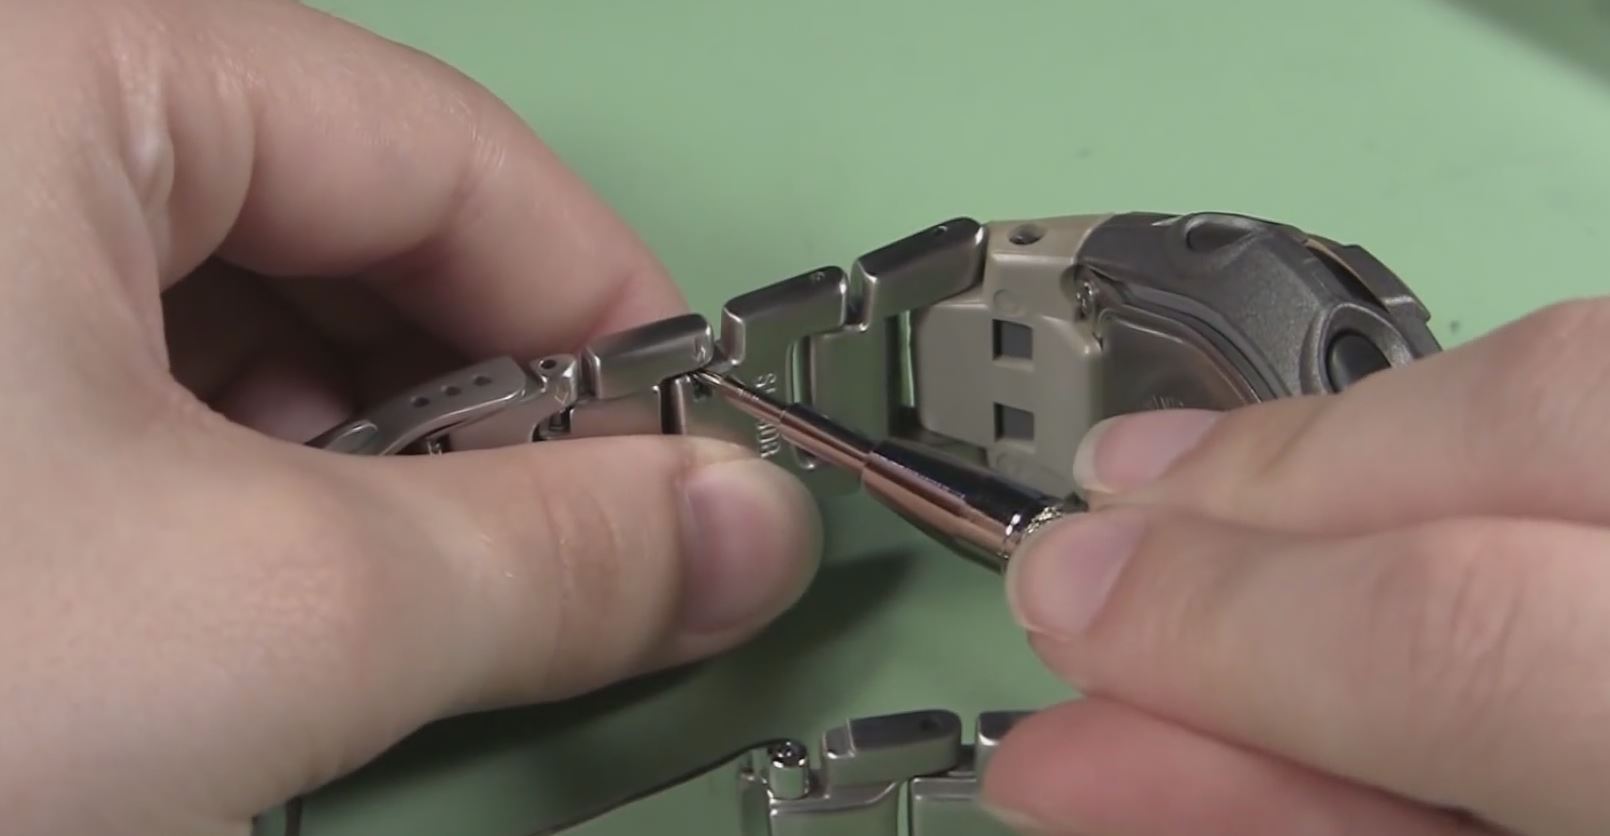
Take your spring bar tool and insert the forked end into the space just above the window in the link where you can see the spring bar. This is where your tool will catch the ring on the spring bar. Push the spring bar down with your spring bar tool and push the link out from under other link. It might take a few tries to work around the window in the link and push the spring bar down.
When the link comes loose and the spring bar is free of the watch band, lift it out of the link with your non-magnetic tweezers and place it in your parts tray. Let the band fall open where the spring bar has been removed.
Step 4
Count the number of links you need to remove from this side of the band and hold the band so you can remove spring bar holding those links in the band.
Step 5
Use your spring bar tool and insert the forked end into the space just above the window in the link where you can see the spring bar to catch the donut ring on the spring bar. Press the spring bar down with your tool and push the spring bar out from under other link. Again, it might take a few tries to work around the window in the link and push the spring bar down so be patient.

When the link comes loose and the spring bar is free of the watch band, lift it out of the link with your non-magnetic tweezers and place it in your parts tray. Set the loose links you have removed in your parts tray as well.
 Step 6
Now, you are ready to put this first side of the watch band back together again. Take one of the spring bars you removed from the band and look at it. One side will have two donut rings on it and the other side will just have a small peg end. Insert the spring bar into the male end of the loose watch band link. The spring bar should go in with the peg end first. Then, position the male end of the link in the other loose link so that the peg end of the spring bar fits into the notch in bottom side of the female link.
Step 7
Take your spring bar tool and push the top of the spring bar down with the forked end. Slide the spring bar and link completely into the female link. Holding the two links together, wiggle the spring bar around until it snaps into place in the notch and holds them together.

Step 8
With the band back together and before you remove any links on the other side of the band, put your watch back on and check to see how it fits. Feel free to do the link test again and see if you still need to remove the number of links you expected.
Step 9
Once you have verified the number of links you need to remove, take the watch off again and turn it so you can remove the next links from the other side of the band. Repeat steps 3 through 7 to remove the remaining links and put the band back together.
Finished
Now that your watch band fits just the way you want, you can wear it again. Be sure to keep the extra links and pins that you removed from the watch in case you need them again in the future.
If you need to add links back to your watch band, you can check out our learning center article on How to Remove Spring Bar Style Band Links to your watch band.


Leave A Comment